Blog Archives

High Desert Gardens are Fun

  Anyone wanting to garden in the high desert must be aware that there are major differences in gardening at a mile high versus closer to sea level!   New Mexico has a wider spread of temperatures from day to night.  Our winters frequently have 60+ degree days with freezing nights.  Our summers have very pleasant nights, but the days can top 100 degrees!  To have a successful garden we need to find ways to help our plants adapt.

During the height of summer when the sun burns down, most vegetables will produce better if they have some shade – especially in the afternoon.  You can provide it by placing the garden next to a wall or tree that can shade it during that time.  Keep in mind that instructions on seed packets that say “plant in full sun” were probably written by someone in Michigan where the atmosphere provides at least 5,000 feet more protection!


Keeping perennials happy in winter can be accomplished by providing a microclimate which keeps them from facing a hard freeze. Place them on the south side of an adobe wall or in an area that naturally holds heat in.


In the book “Creating Microclimates for High Desert Gardens“, I discuss why High Desert gardening is so much different than low land gardens.  Inside you’ll see dozens of techniques which can help your flowers and vegetables thrive!

Click here to order.


Suburban Prepping

Every decade has something big that upsets how most people prefer to spend their time – many times it is a weather event – hurricanes, tornados, tsunami, or massive blizzards for instance.  All of these cause us to hunker down and find ways to survive with home, family and fortune intact.   This time it is Coronavirus.

I read in the news and on facebook how people were panicking about hand sanitizer,  toilet paper and drinking water and heaven knows what else.   These are the times when it is good to know how things were handled before plastic water bottles and Charmin.

It is also preferable to use common sense instead of blindly running with the herd.  I was lately guilty of that one.  The tap water we have is really very tasty and well filtered – it is county operated.  As I passed Sam’s Club earlier today and saw the extremely crowded parking lot I was remembering that drinking water is always one of the primary items needed in emergencies and for a brief…very stupid…moment I thought about fighting the crowd to get some plastic bottles.

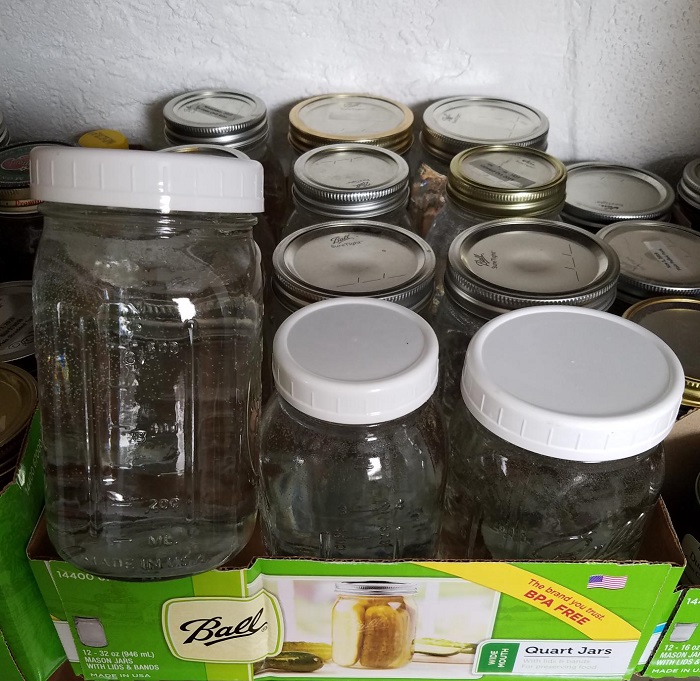
Then the spirit of Grandma Kern reached down from heaven and slapped me upside the head with visions of the shelves full of empty half-gallon and quart canning jars in my pantry!  DUH!   I got home, pulled them down and washed them out before filling them with tap water and a couple drops of chlorine bleach apiece then lidded and put back on the shelves.  (NOTE: always keep jars of water out of direct sunlight).  I now have 8 half gallon jars and 30 quarts of drinking water squirreled away in case of need.

As for wash water, I always keep my gallon bleach bottles and fill them with water.  They are stacked under a shaded portico near my well head to prime the pump with.  (I use well water for my gardens).  This is my primary stock for wash water if needed and are usually filled with well water, though people could use city water as well.

As for toilet paper…really?  Yes I have a case of it, but then I always buy it by the case because it is the most comfortable option.   In the old days there were outhouses where people tore pages from newspapers and Sears catelogs or large leaves to wipe with, but those tend to clog up modern toilets. Other options that even city folks can use.  I have a basket full of old clothes that have holes in them or are just worn out.  Cut them up into small squares and use them.  You can rinse them out and reuse if washed with bleach.   Old T-Shirts and bed linens work great.  Just don’t be a dunderhead and try to flush them down a toilet!

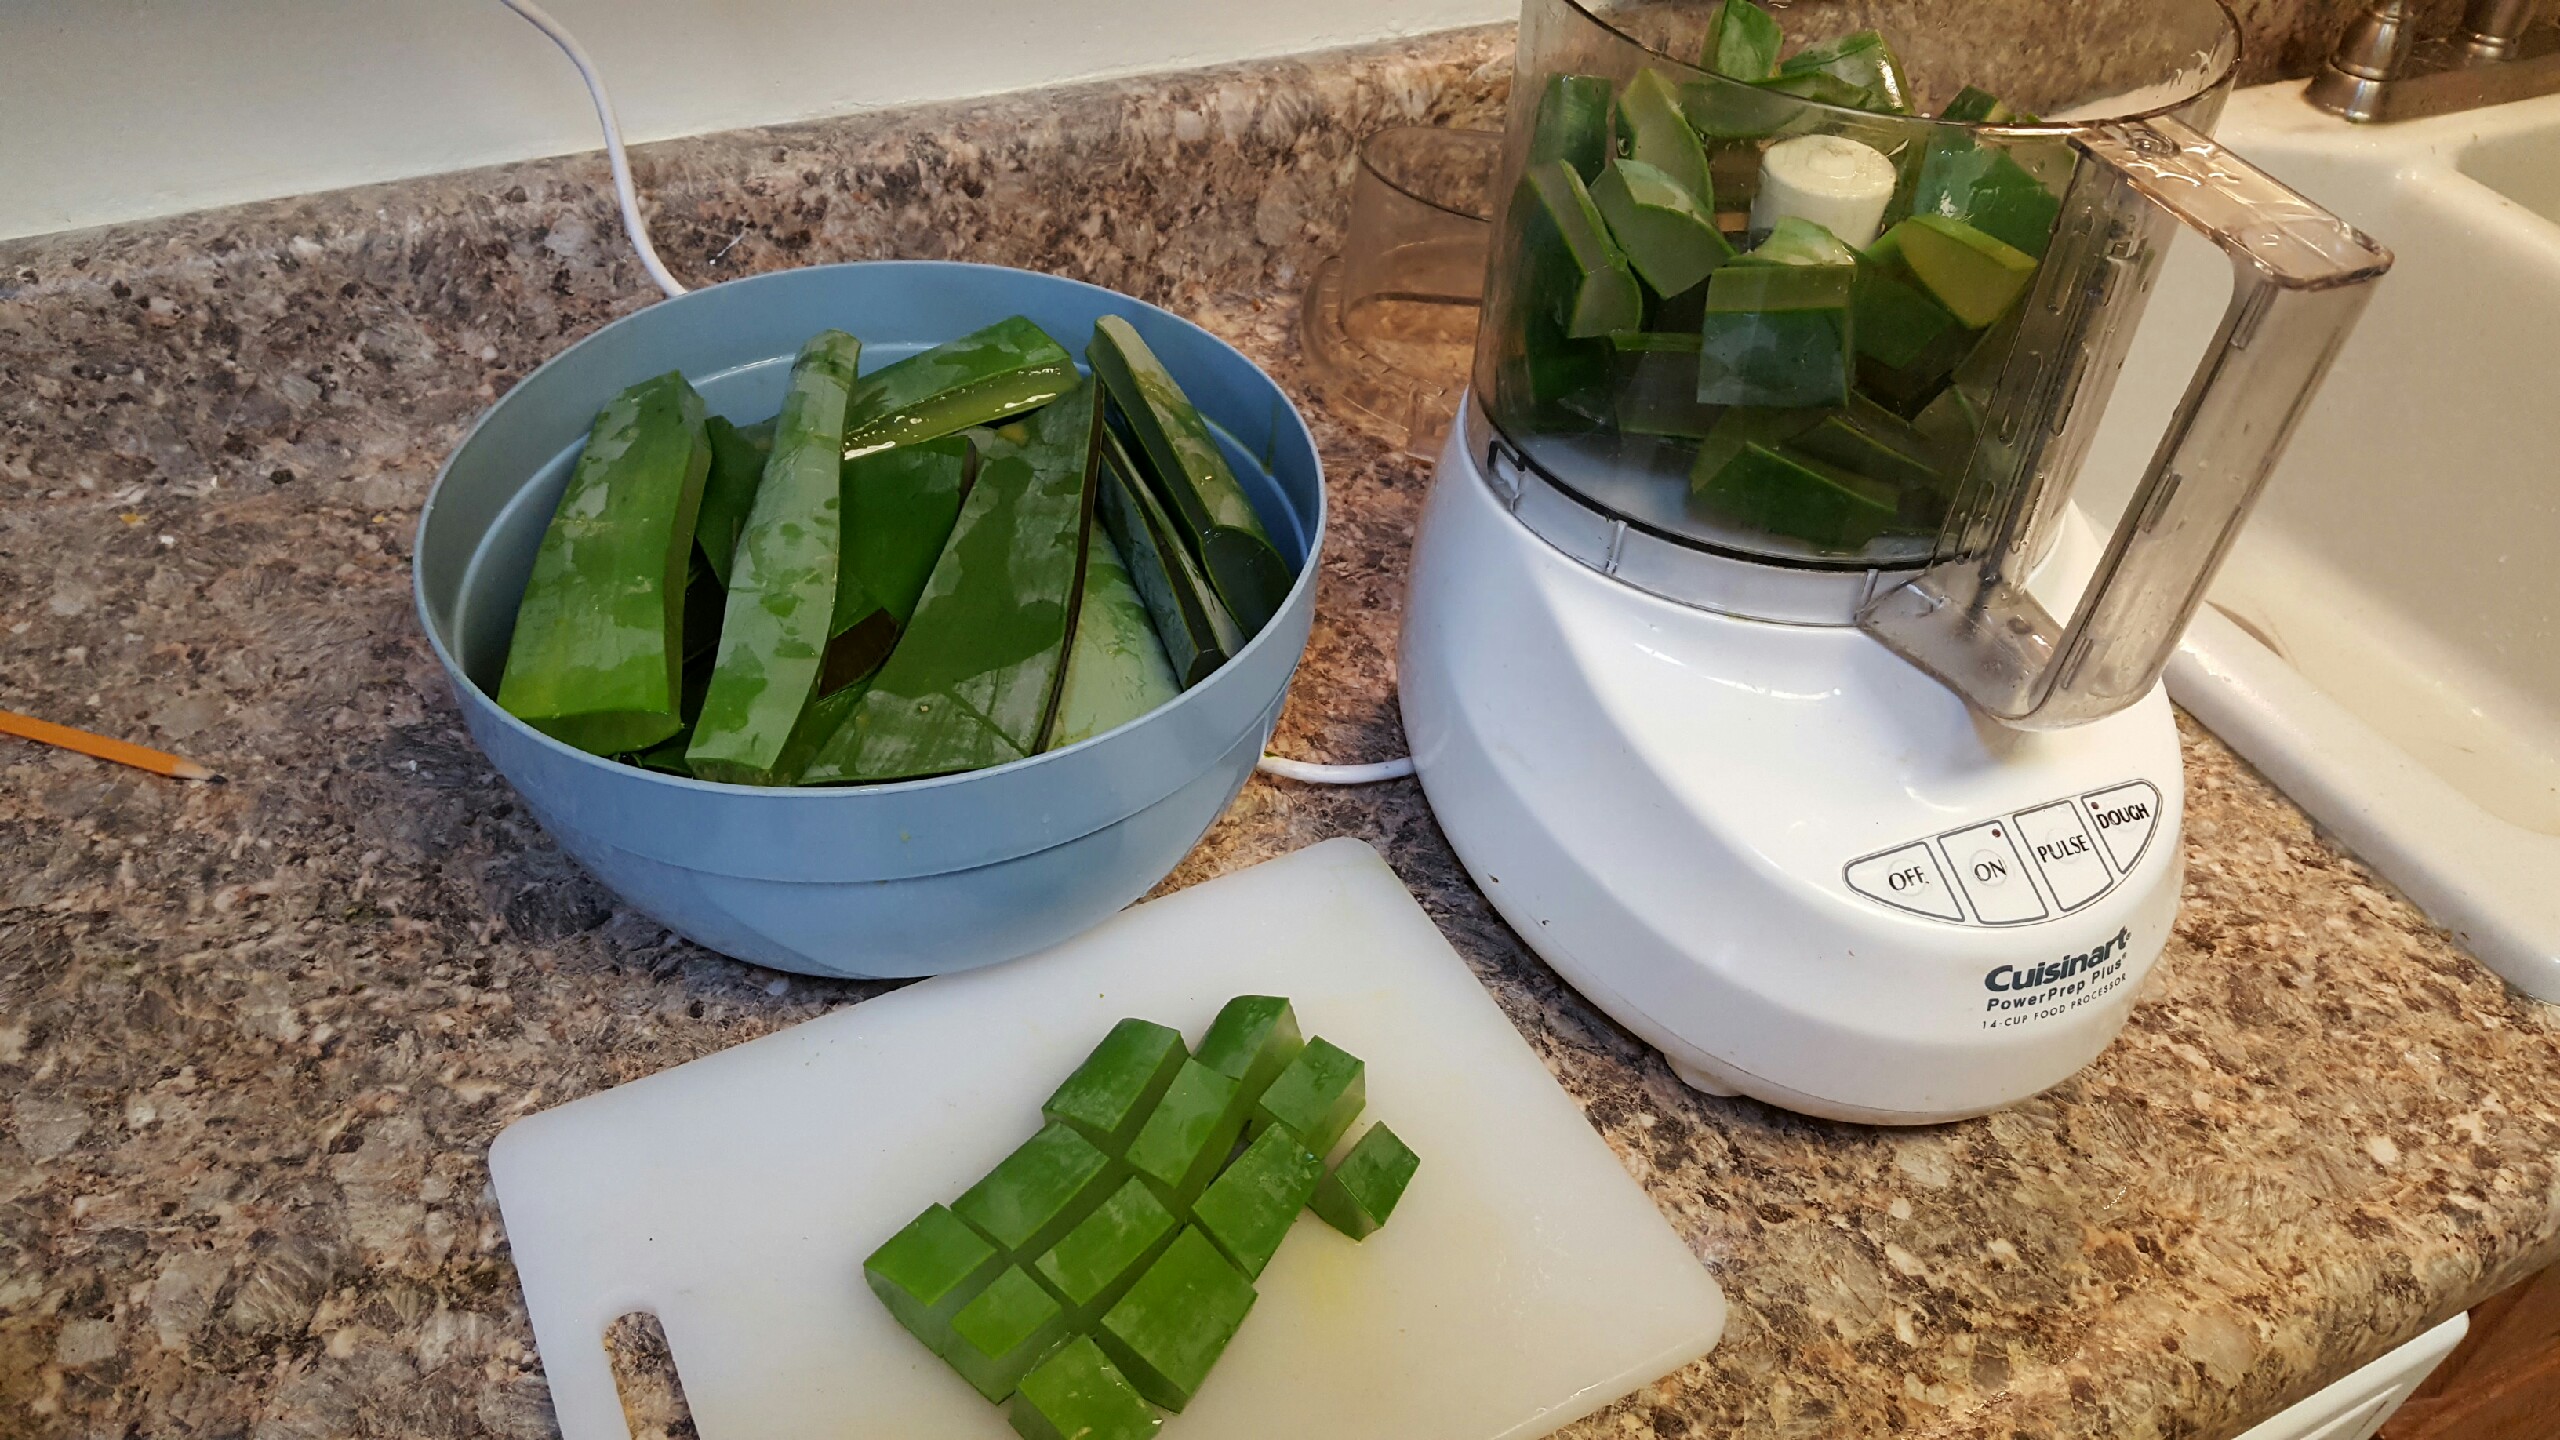
Lastly, hand sanitizer.  You can make some that is just as easy on the skin as the commercial stuff.  Mix 2 parts rubbing alcohol to 1 part aloe gel.  Aloe gel is in the stores, or if you have a monster aloe plant in the house it is fairly easy to strip the gel out.

How?   Harvest the thick flesh leaves and slice the spiny edges off then cut into pieces and place in a blender or food processor with a little water.   Whir it up good.  Place a strainer over a big bowl and dump the resulting goo into the strainer then go do something else for a couple hours.  When you come back use the back of a metal spoon to push down a little and get the last drops out.  Throw the discard on the compost heap (plants love it) and mix the goo up with the alcohol for instant hand sanitizer.

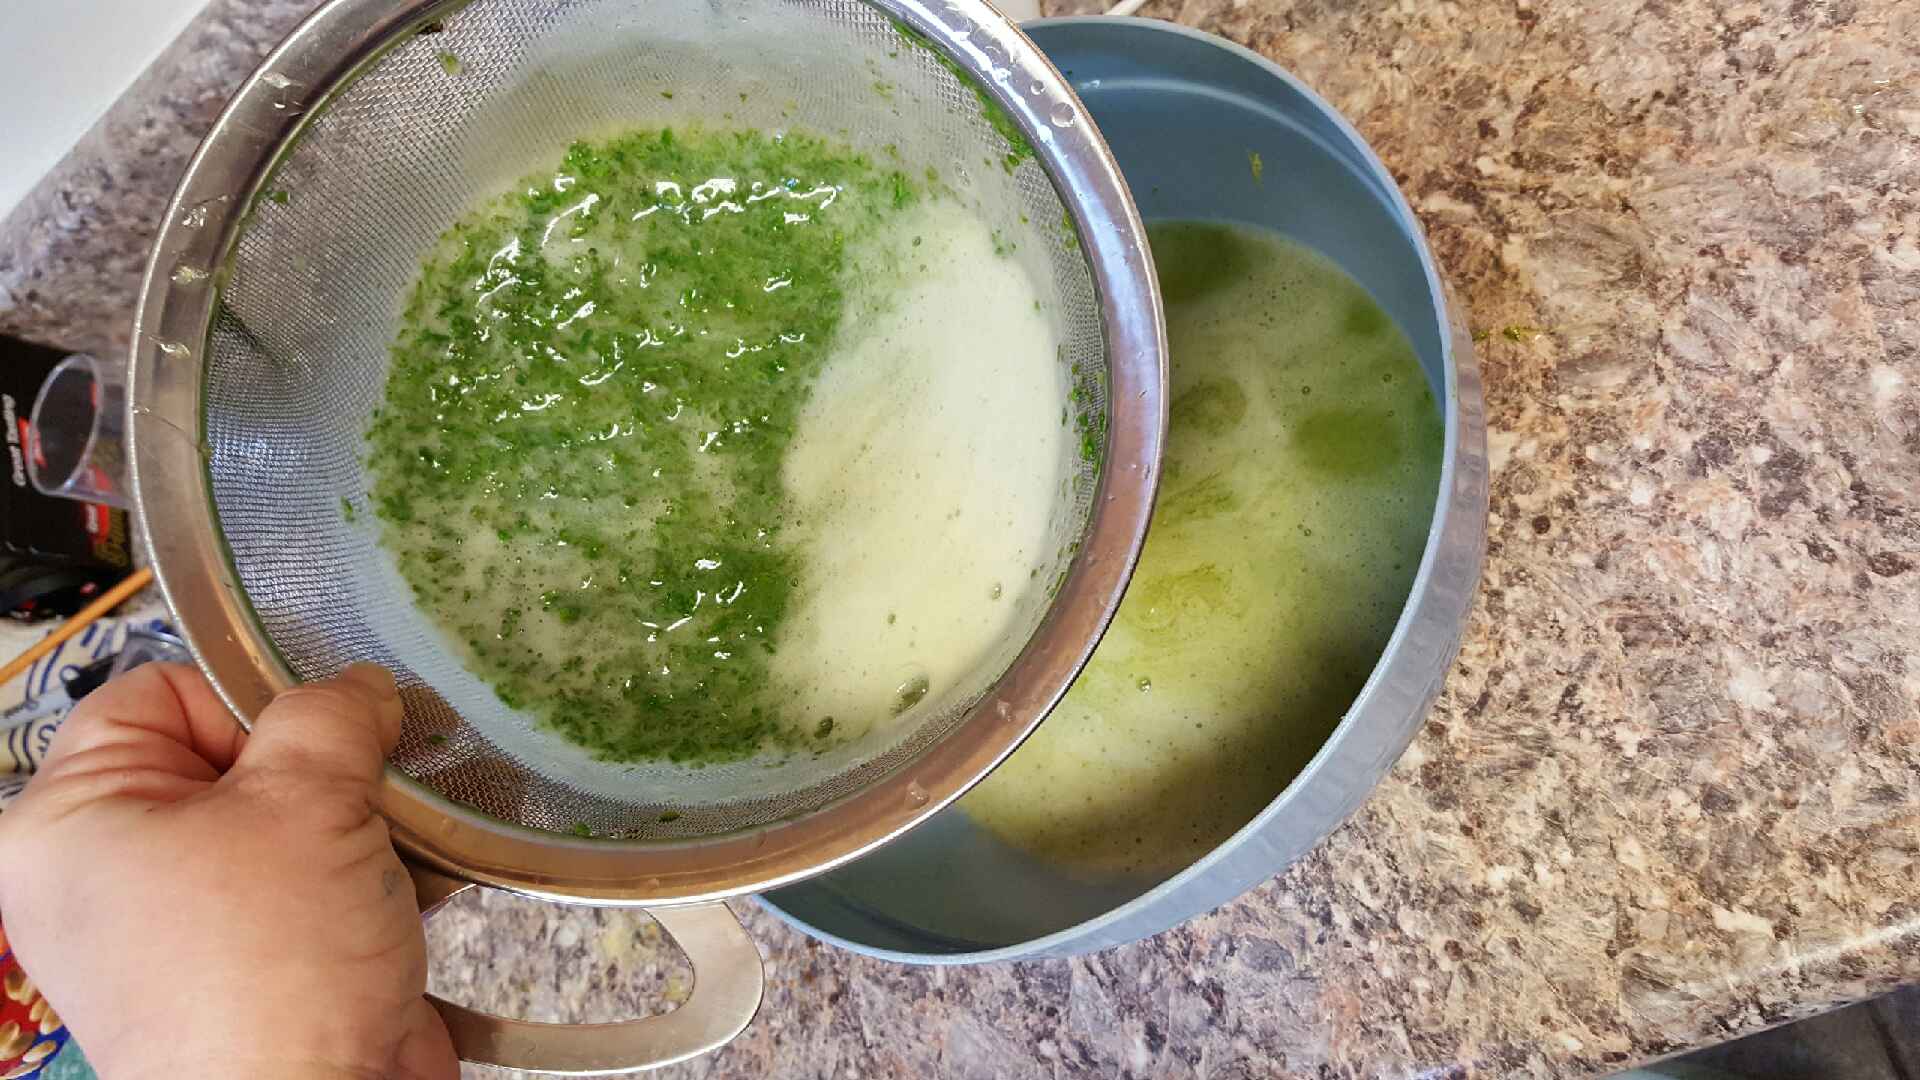
 NOTE: It can have a few floaty plant parts in it – that doesn’t hurt anything – just proves it did not come from a factory.

My personal motto in life is this:  Get ready for the maybe, then let it go.

Don’t let panic dictate your actions.  Think about what each kind of disaster could mean to you and yours personally and look into options for how to deal with it in advance.   Be confident in yourself and read some of those great magazines like Countryside, Mother Earth News, and Sustainable Living.  Even if you don’t do all the things in them all the time at least the knowledge that they can be done will be nestled in the back of your brain.


Pill Bottles and Altoids Tins

In our endless quest to save the planet from humanities concept of “progress” I find it comforting to draw upon the wisdom of our ancestors.  Recently I had a long chat with Mom, who was a little girl during World War II.  I’d grown up in the suburbs of a midwestern city and therefore was part of the “baby boomer” generation.  We were the ones who experienced many of those leaps of technology designed to make life comfortable and taught us that immediate gratification was possible.

New Mexico has recently passed legislation echoing that of other cities on the road to sustainability.  Stores must not provide single use plastic shopping bags to customers anymore and restaurants must find something besides styrofoam or non recyclable plastic boxes for takeouts and leftovers.

I’ve always liked reusable shopping bags, but I must admit I have frequently gone to the store only to find I’d left them in the house.  Developing new habits like immediately putting them in the car after unloading is tough on old birds.  Personally I never threw out the old plastic shopping bags – I’d save them up and use them for collecting the canine defecation from the back yard or tucking them in the corners of boxes full of Holiday gifts being sent to family.

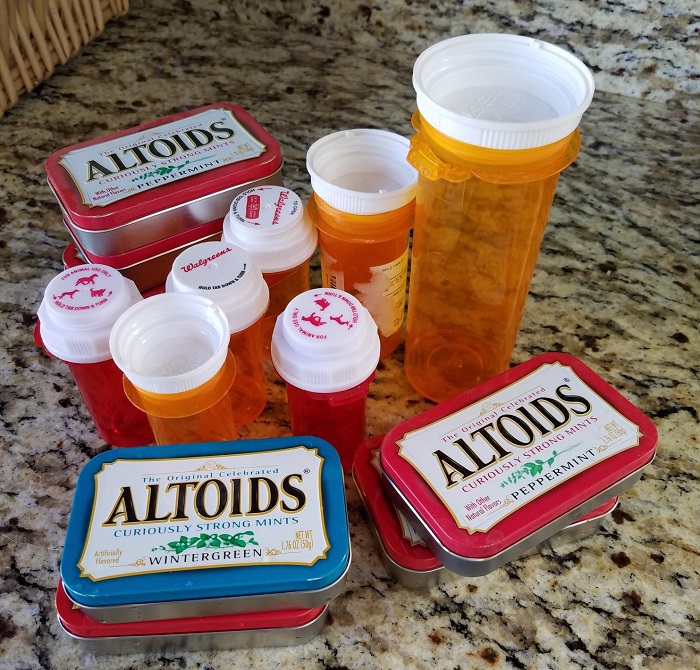
Two things I’ve always collected and found uses for are pill bottles and altoids tins.  I wish I could just clean out the pill bottles and give them back to the pharmacist, but they won’t take them.  That would simply make too much sense! However, they are perfect for storing so many little things especially as they come in many sizes.

  • beads and jewelry
  • screws and nails
  • seeds (the dark color helps keep them viable!)
  • sewing needles and safety pins
  • buttons
  • paper clips
  • tacks
  • hearing aid batteries

If you drill small holes in the lids they can make good seasoning shakers, or slightly larger holes let you use them for evenly distributing small seeds like carrot and poppy while planting the garden.

Altoids tins can provide easy storage and transportation for smaller items as well.  Mom told me that people used to store soap and candles in tin boxes to keep mice from eating them.  I find that this is quite practical while traveling today – it keeps bar soap from getting messy.

They are just the right size for carrying multiple flash drives, phone charger cords, and ear plugs. If you are camping and need to keep fire lighting materials dry and ready, load one with cotton balls lightly soaked in oil and place books of matches in another one.

Although the bright colors and lettering on the tins are fairly attractive, it is easy to get confused as to what is in which tin.  I like to spray paint them a solid color and if needed you can then label them with permanent markers.   This is also a fun project for kids as they can paint the outsides and glue beads or small stones to the lids.

Of course you can always puff yourself up with civic pride by chucking the plastic and tins in the recycle bin, but why not find a new use for them?

I invite anyone reading this to share your inspirations as to what pill bottles and altoid tins can be used for.  Just send your ideas to   solarranch@swcp.com and I’ll post them below!

Francis Rose


Zucchini Fritters and Bread


Yes, it is THAT time of year again.  Harvest baskets are full of delectable, delicious garden treats and Zucchini is taking over the world!   Here are a couple good recipes that allow you to extend your joy in the harvest as both can be cooked and frozen for use later.


Zucchini Fritters

  • 3 c grated Zucchini
  • ¾   c chopped onion
  • 3 eggs beaten
  • ½ c parmesan Cheese grated
  • ¾ c bisquick, flour, or gluten free flour mix
  • ¼ c Milk (optional)
  • dash of salt and/or pepper

Mix all together.  Fry like pancakes.

Delicious topped only with butter, or you can slather them with honey or maple syrup.  They pair up great with eggs for breakfast, or slather with peanut butter between two fritters for a sandwich.

Leftovers can be frozen then rewarmed in the toaster or microwave.


Momma Rose’s Zucchini Bread, Gluten Free

  • 2 Eggs
  • 1/2 Cup Vegetable Oil
  • 1 Cup Sugar
  • 2 Teaspoons Vanilla
  • 1 1/2 Cups freshly shredded Zucchini
  • 1/4 Teaspoon Baking Powder
  • 1/2 Teaspoon Baking Soda
  • 1 Teaspoon Ground Cinnamon
  • 1/2 Teaspoon Salt
  • 1/4 Teaspoon Ground Cloves
  • 1 1/2 Cups All Purpose Gluten Free Flour mix*
  • 1 Cup Chopped Walnuts or Pecans (optional)
  • Preheat oven to 350 degrees.

Beat eggs, sugar, and oil in a large bowl with electric mixer. Add vanilla and mix well. In a separate bowl, combine flour, baking powder, baking soda, cinnamon, and cloves. Add dry ingredients to wet ingredients and stir by hand to mix well. Add zucchinni and chopped nuts and stir to combine.

Pour into a greased 9×5 loaf pan and bake in a conventional oven at 350 degrees  for 60 to 70 minutes, or a solar oven above 270 degrees oven for about an hour and 40 minutes.  Just look for the top to be rounded up and brown then test with a toothpick inserted into the middle to see if it comes out clean.

*If you don’t want it Gluten free just use any all purpose flour mix.


Harvest Suggestions for Suburban Farmers

Mistress Rose‘s Garden

I live just outside of Albuquerque, New Mexico on half an acre.  This is a convenient halfway point for anyone who longs for a touch of country self-sufficiency but who may have a need to be near a larger population base for some reason.

The property is large enough for me to have a 50×60 vegetable garden, fruit trees, a beehive and chickens.  I enjoy organic gardening, canning and otherwise processing the foods I eat to enjoy all year.  The problem is that my harvest extends for a long time, but I don’t always have the time to pull down my canner!

Commerical farmers plant large areas and harvest everything at once – at the time they feel their plants have most of the produce at a perfect state of ripeness.  Then everything gets trotted off for processing.

In my garden I have 7 varieties of peppers, 3 types of tomatoes, green beans, lima beans, corn, peanuts, potatoes, onions, peas, asparagus, apples, pears, pecans, cherries, and a lot of herbs.   They do not all ripen at once.  (thank heaven)

Sometimes I can anticipate when a lot of one thing will be ready, but more often than not things will ripen in stages.  It is ridiculous to fire up the pressure canner for just a couple of quart jars!  Not to mention that sometimes other personal responsibilities or vacation will supercede the joy of cooking and processing.

There are a few ways you can handle this with your kitchen garden to make it easier and more efficient.

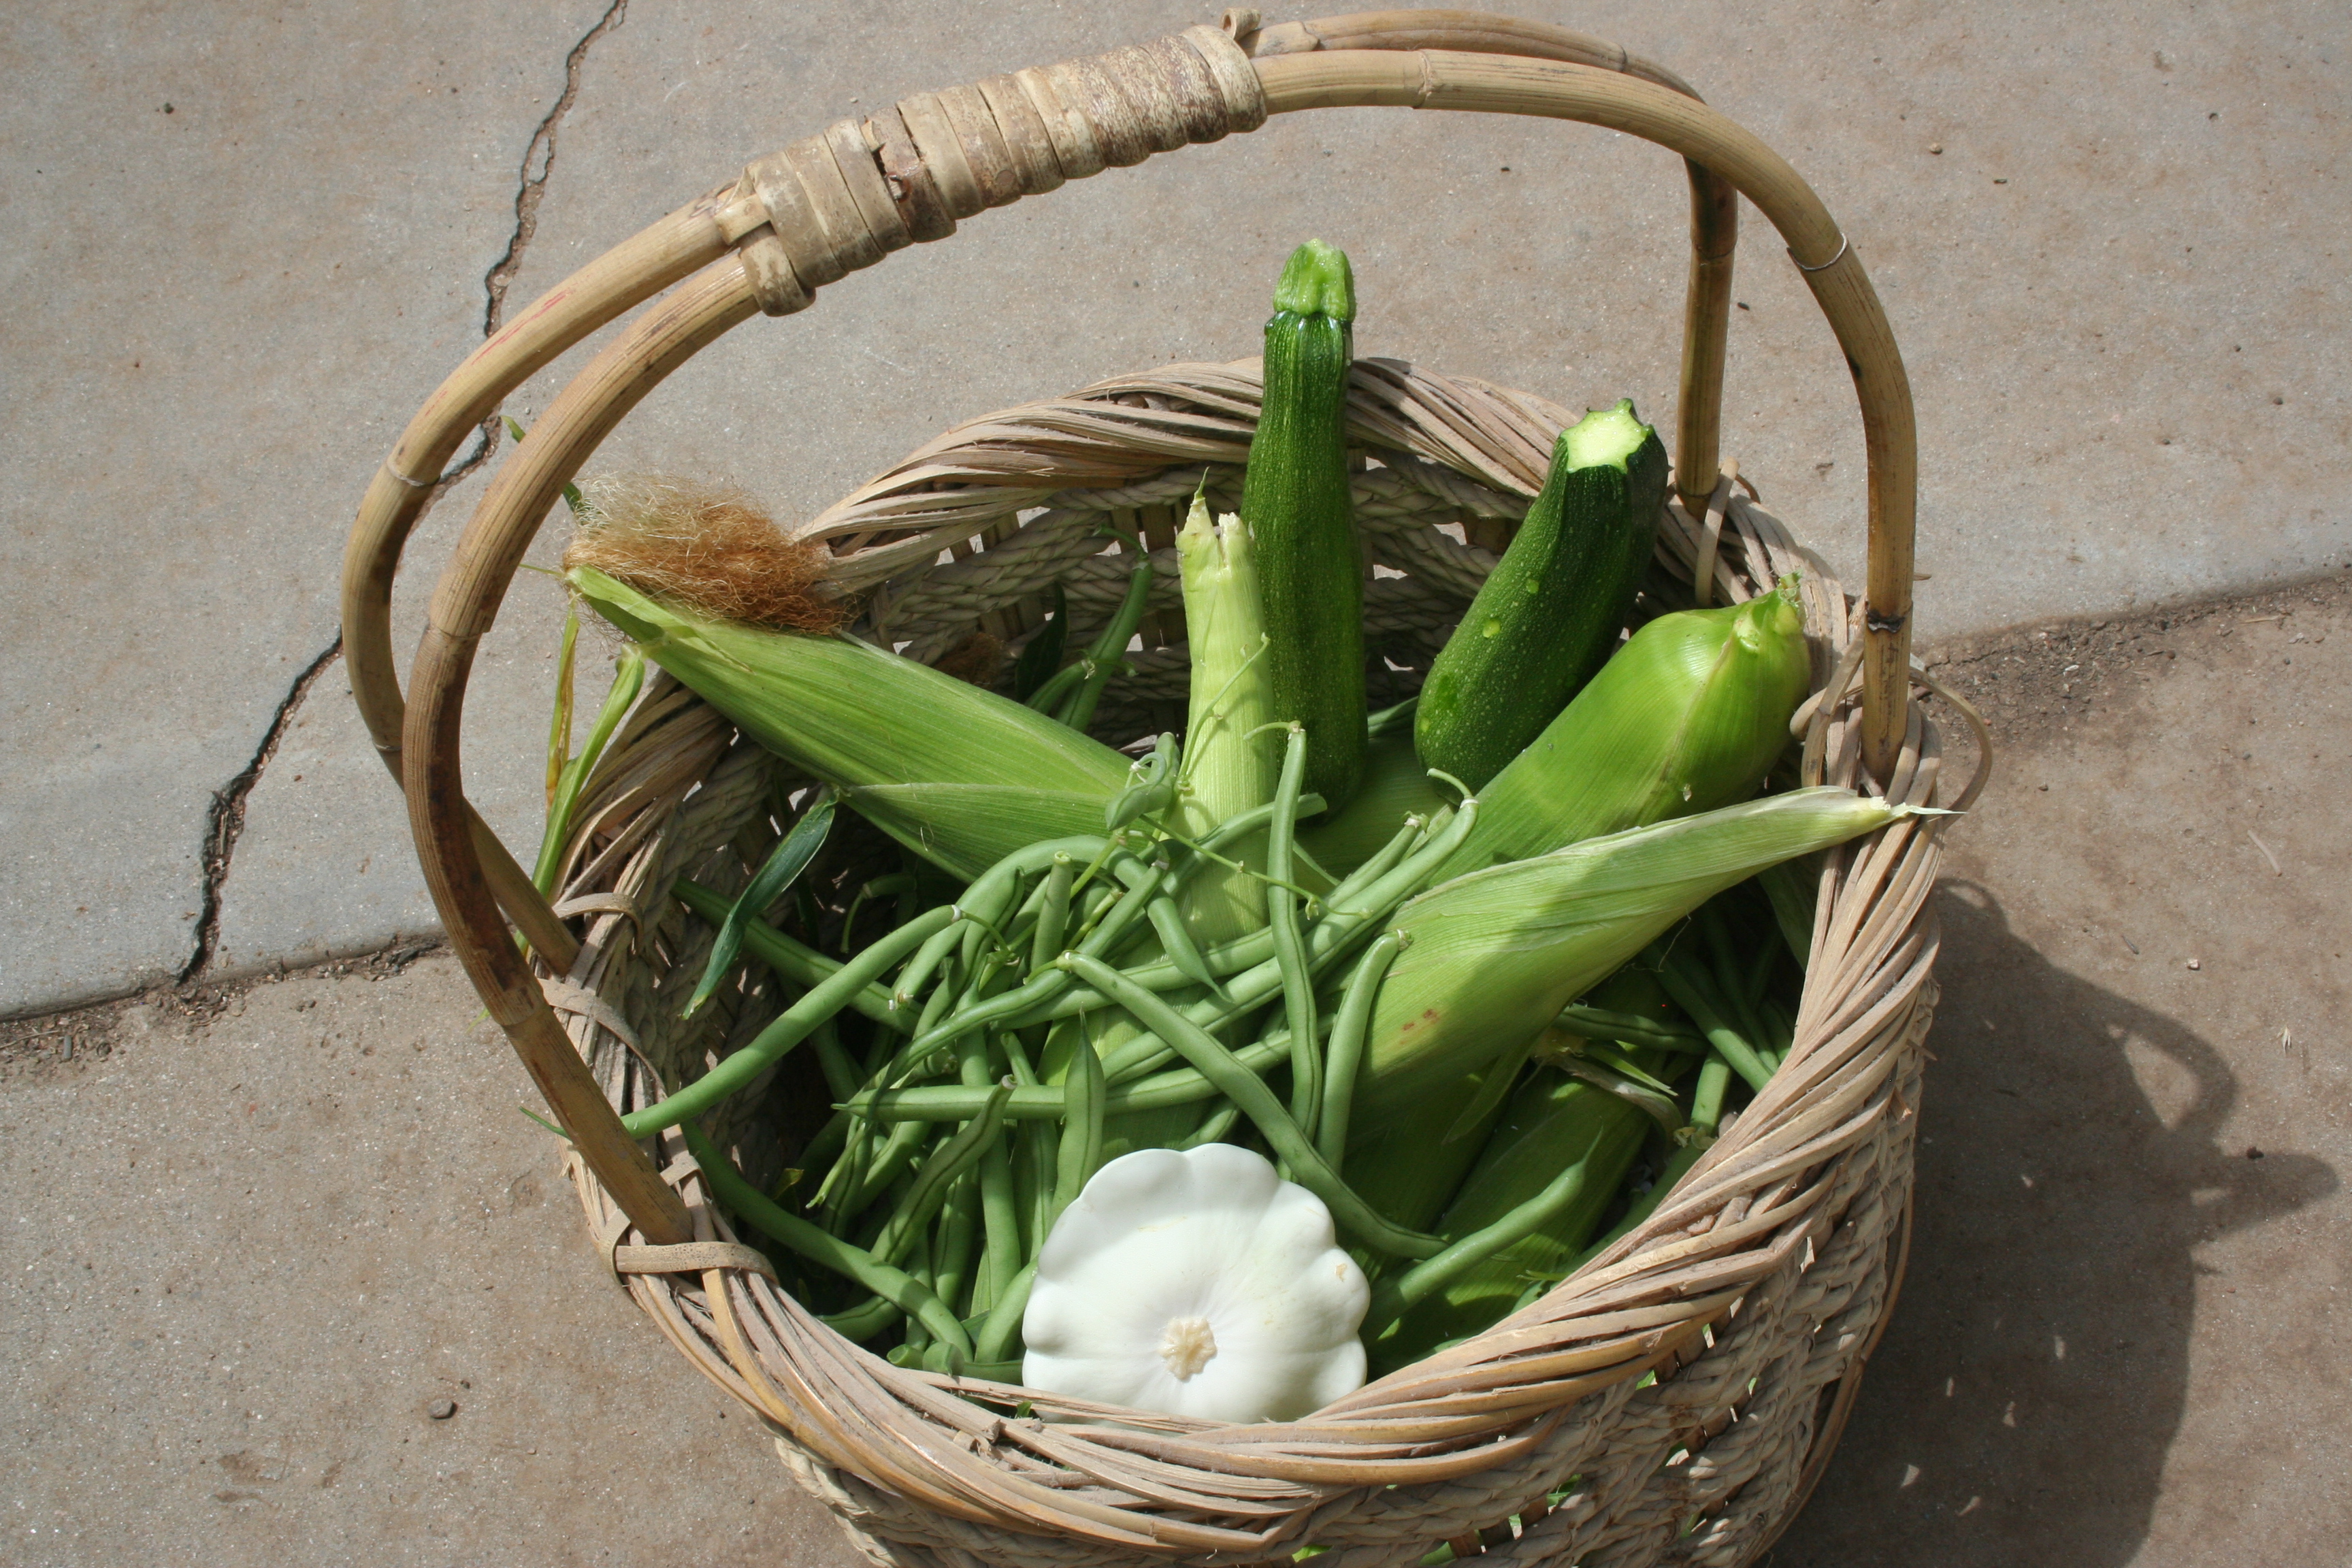
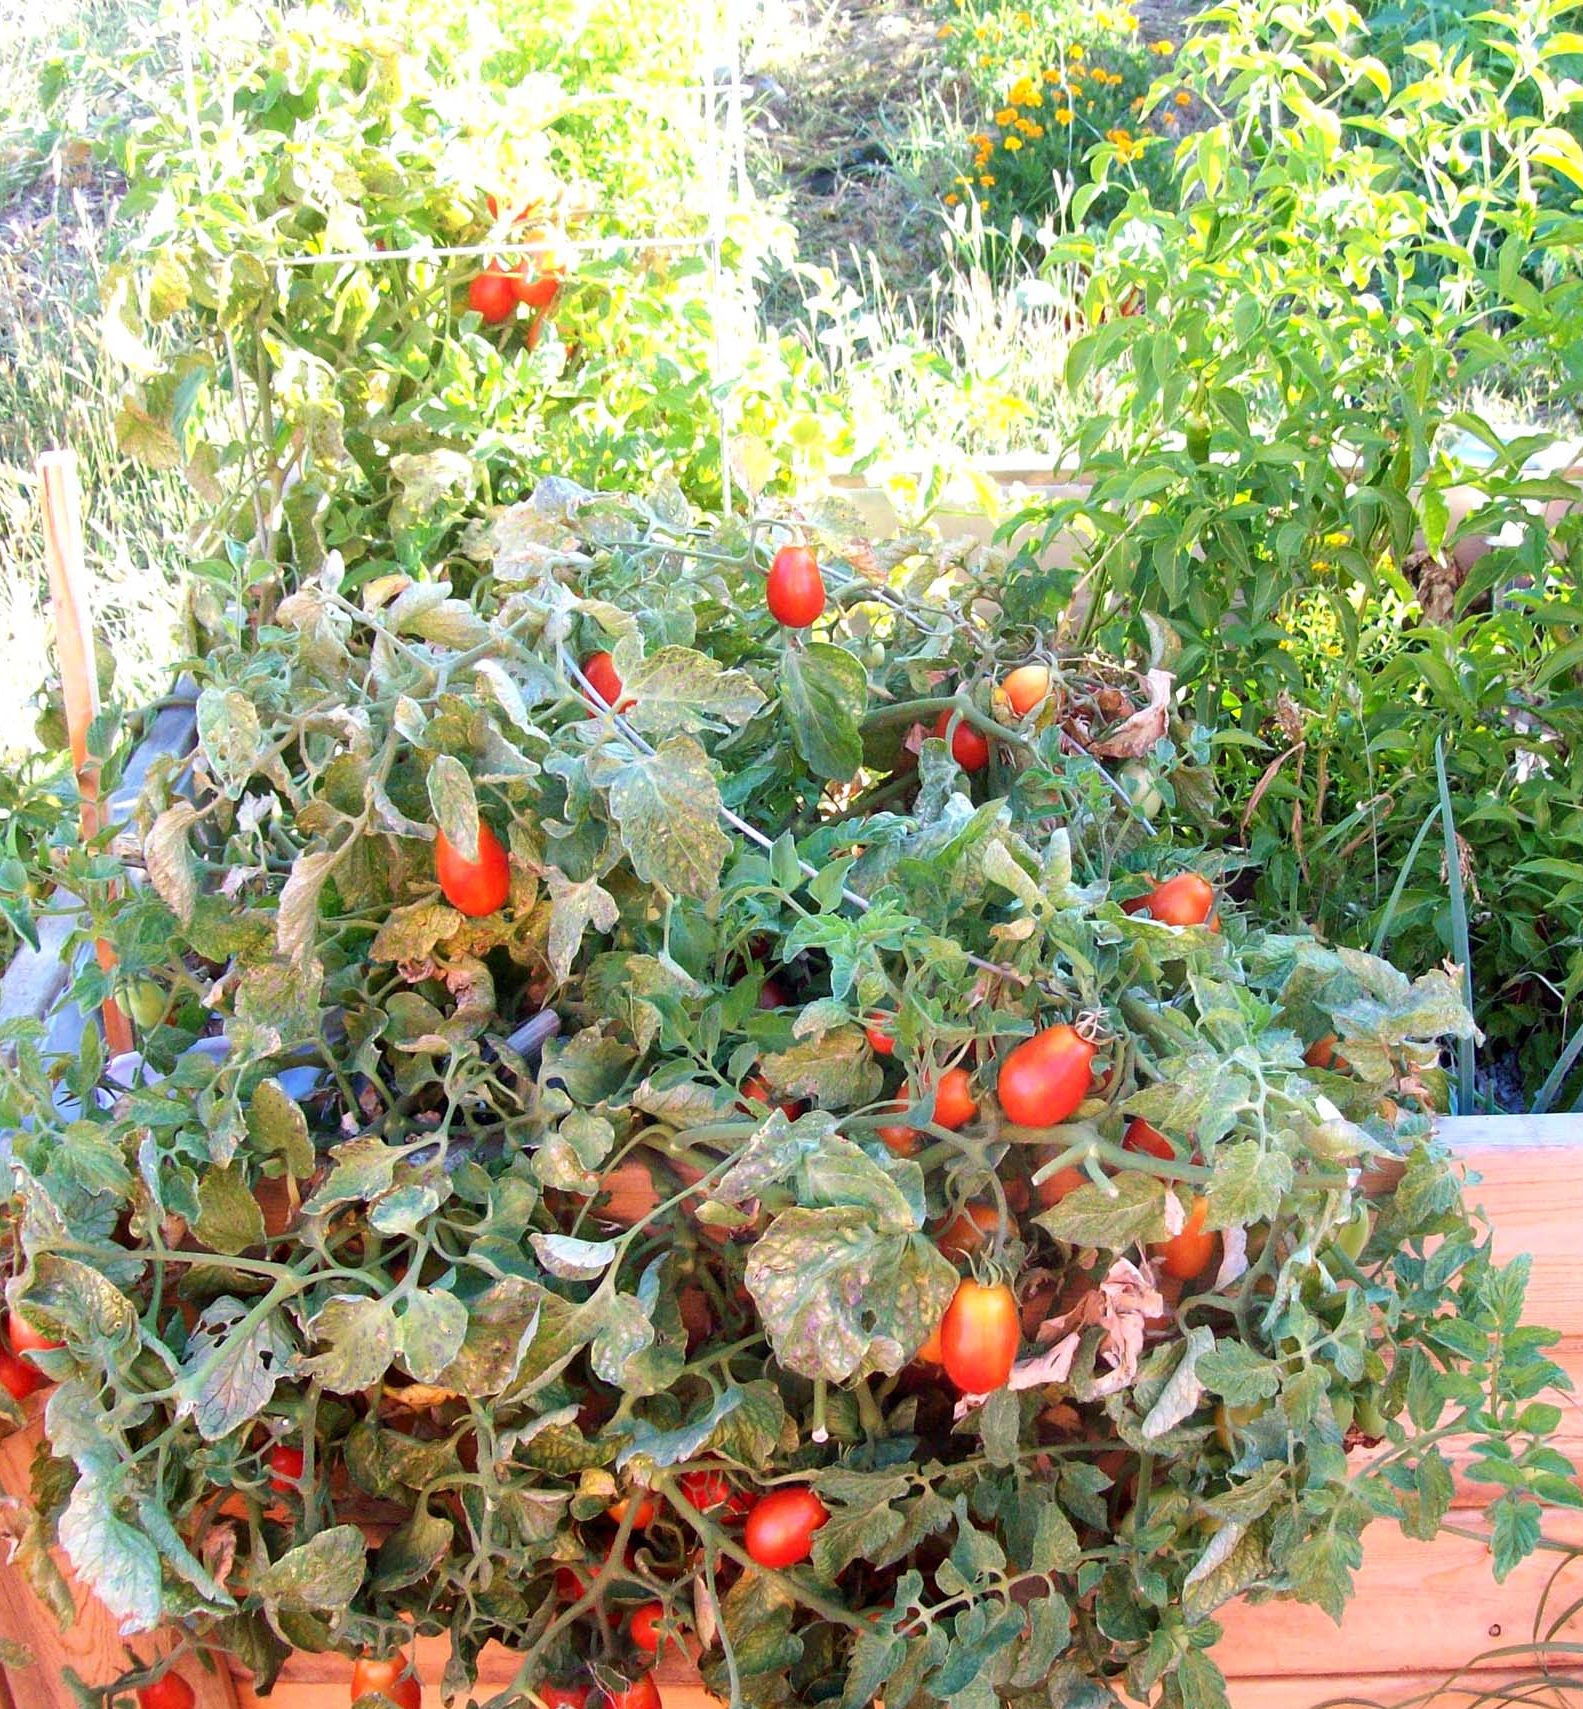
Tomatoes are one of my favorite items to preserve – they are so versatile! Salsas, soups, sauces – YUM!   The first luscious red fruits are sparse, but over time they pick up the pace.  I plant just a few of the large beefsteak type tomatoes, a couple cherry tomatoes and 7 or 8 thicker paste tomatoes.  Though the beefsteak and cherries are primarily for eating fresh, an overabundance of either can be added to the paste tomatoes when canning.

During those times when there are more ripe tomatoes than I have time to process, I will harvest and wash them, frequently cutting them into chunks and removing stems or spots.  Then they get put into a gallon sized Ziploc bag and plopped into the freezer.

Freezing at the peak of ripeness is a perfect way to build up enough of them for a good day of cooking and canning later on.  I leave the nutritious skins on because tossing them in a food processor pulverizes them beautifully.

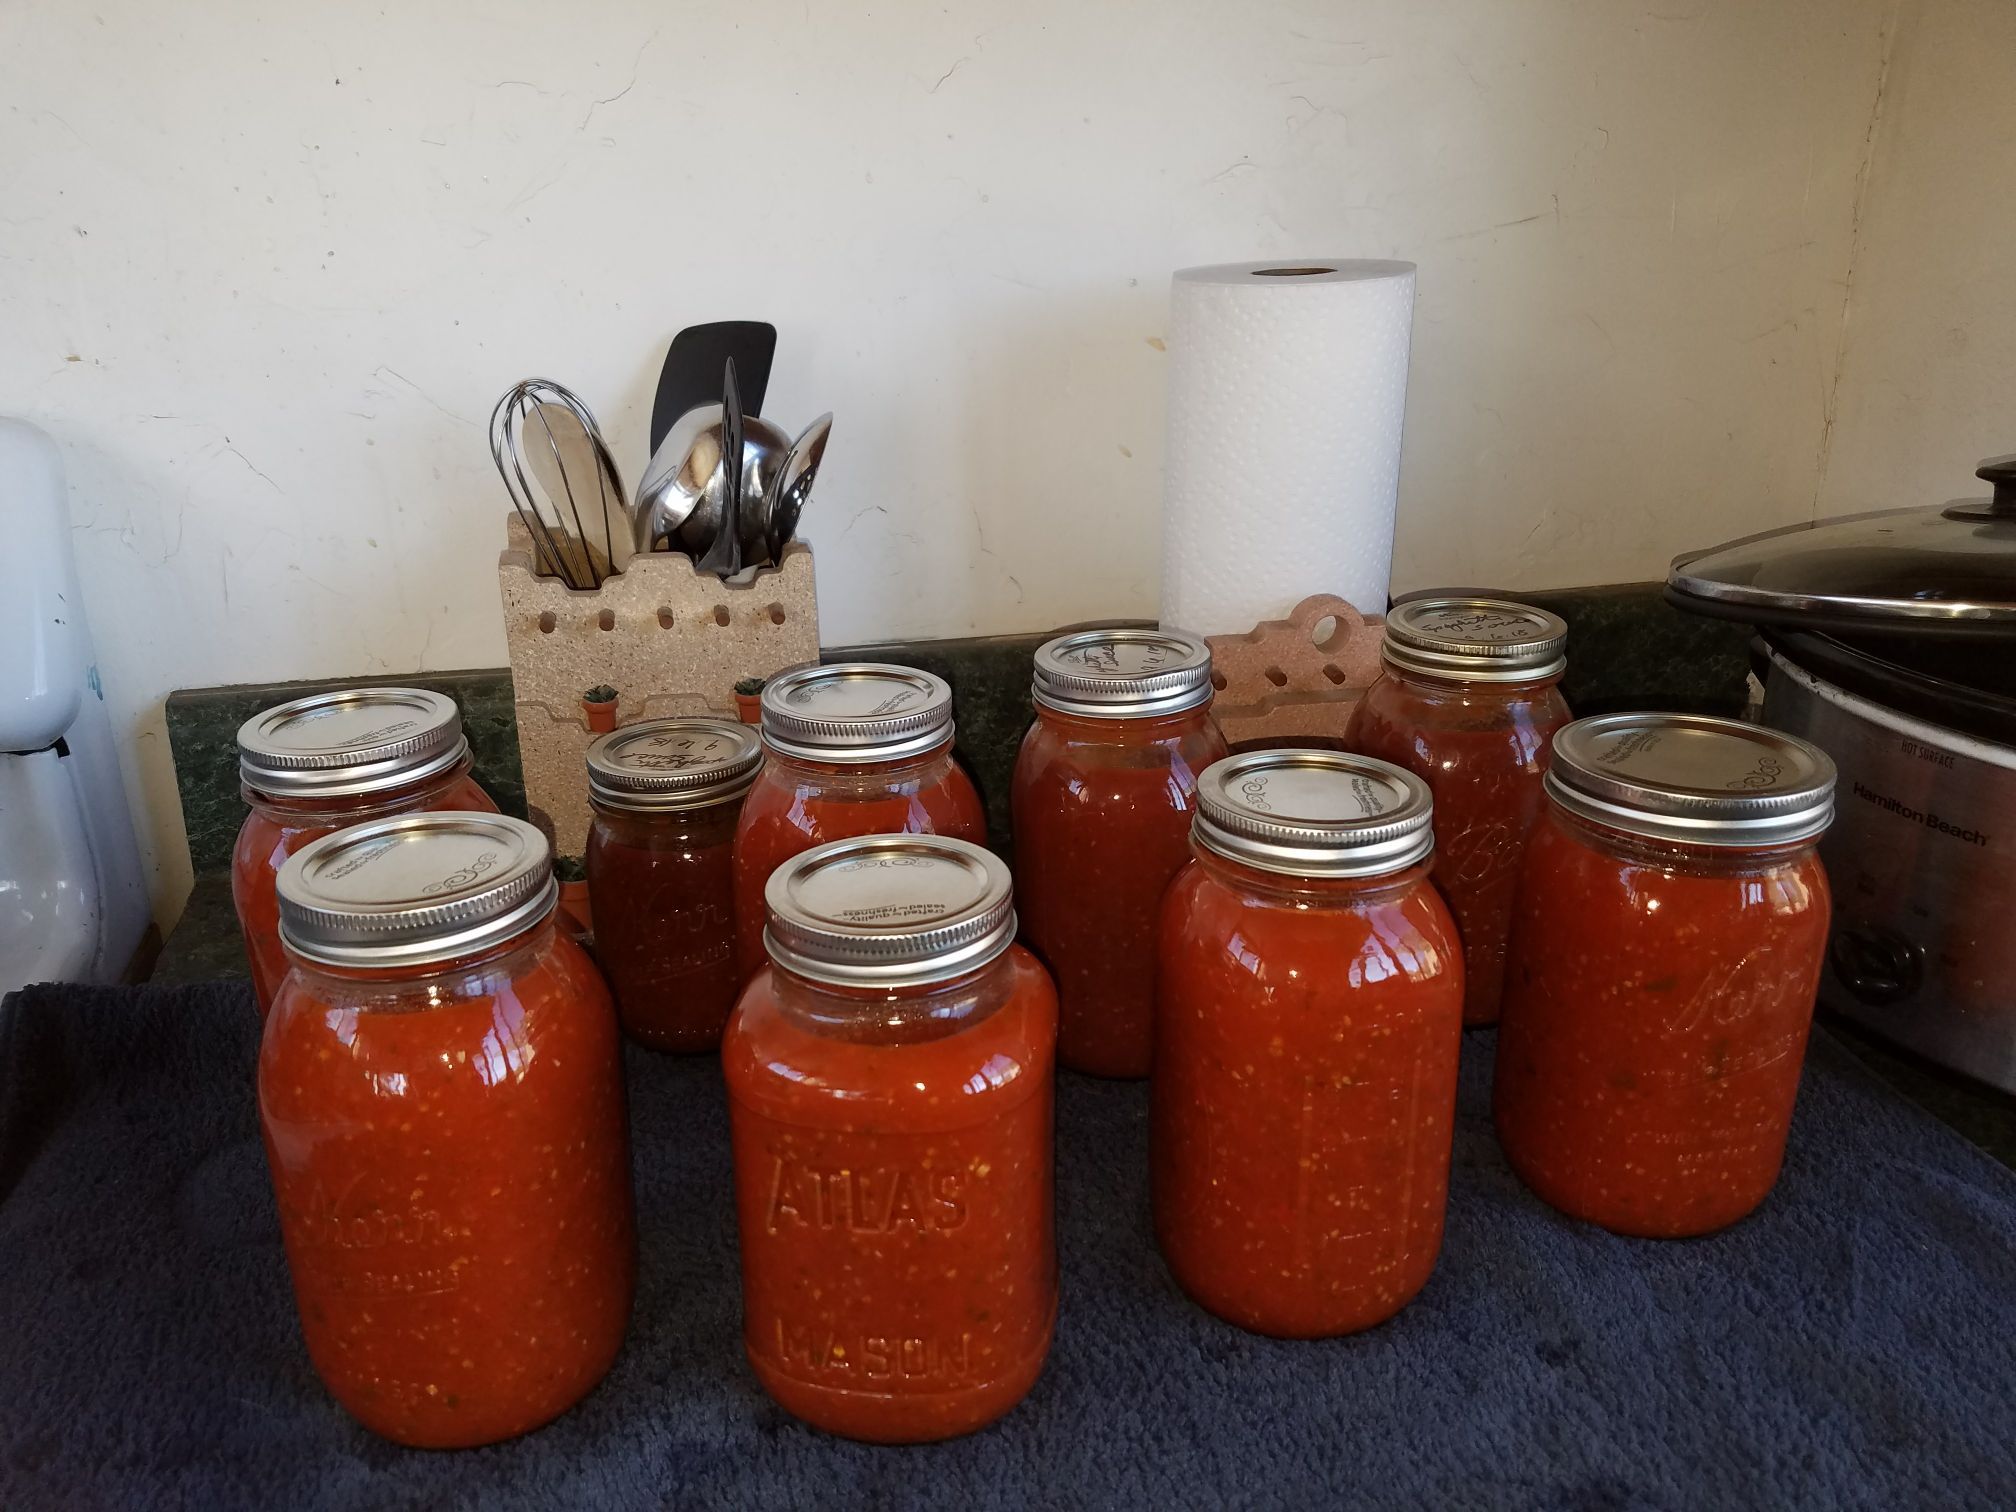
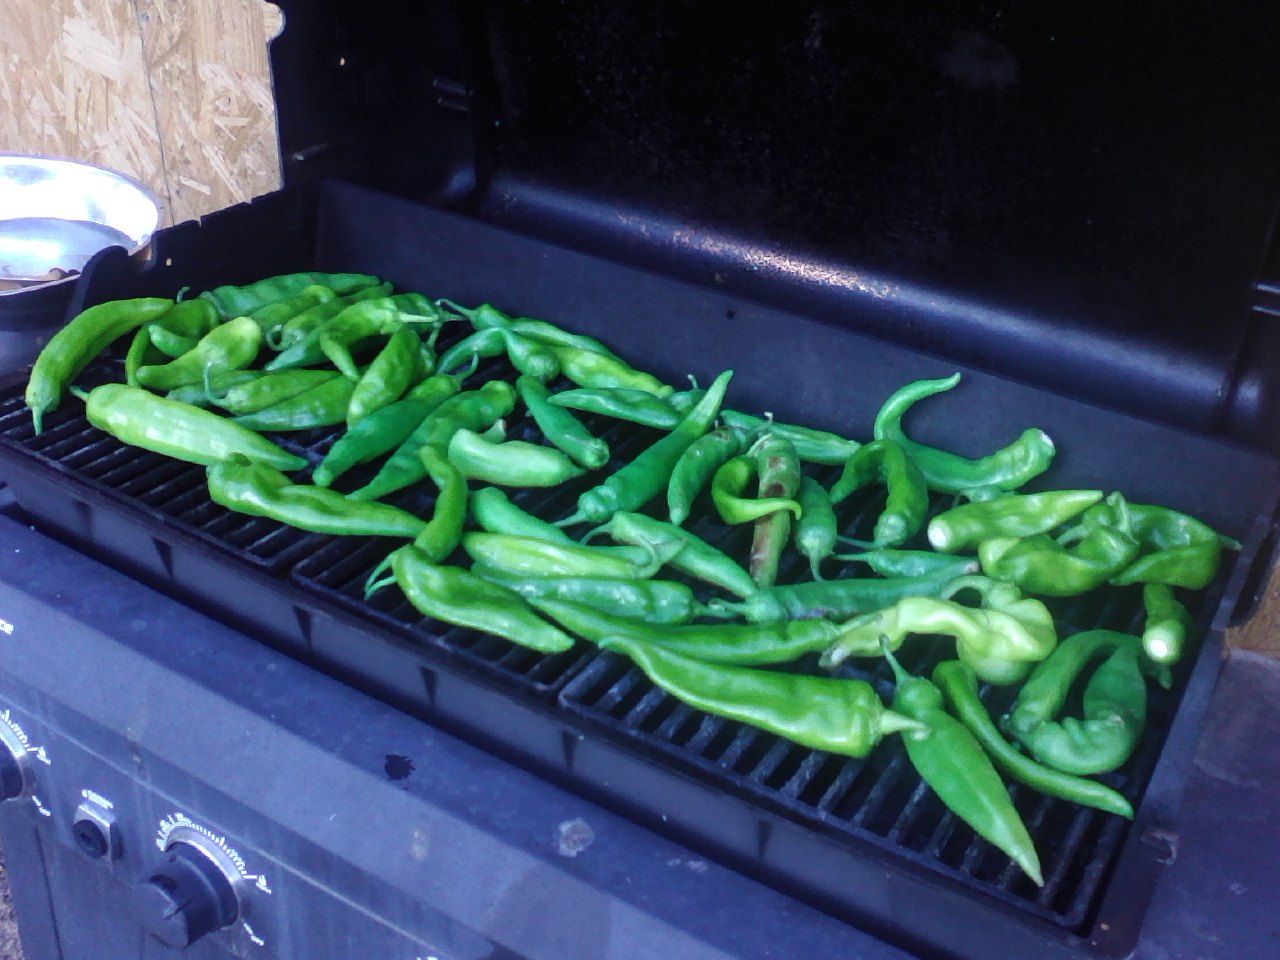
Another vegetable than you can partially process then freeze for future use are green chili peppers. Chilis are normally roasted and skinned before being cooked or canned. If you have a couple hours you can pick the ones you feel are large enough and roast them on your BBQ grill.  You want them to puff up and the skins to brown and crack a bit – but don’t blacken them entirely!

You can grill at least a bucket full at a time.  First soak the peppers for 1- 3 hours in water, then fire up the grill to high and toss them on.  An option to turning them individually by hand is a grilling basket or rotisserie cage which allows you to turn them easier.

Take the roasted peppers and place them in a zip bag or other airtight container while they are still very hot and let them set in a warm place for a few hours or overnight.  This is called “sweating” them, which helps separate the meat from the skins.  Then plop them in the freezer.

Some people just leave them in the freezer until they wish to use them in cooking.  I don’t have enough freezer space to keep everything I harvest there so I process as much as possible by canning.  When you are ready to use them or can them you take them from the freezer to a clean kitchen sink.  Fill the sink with water and when they thaw out you can begin stripping the skins from the peppers by hand.

Wearing rubber or latex gloves is a VERY good idea as the capsaicin in the peppers will make your hands burn after a while. I usually heavily cream my hands an hour before donning the gloves as an extra precaution.

Once the skins, stems and most of the seeds are removed you can either process them whole, chopped, or make great tasting sauces with them.   I get heartburn from bell peppers and poblanos, but I have no problems with pimentos, cayenne or green chili.  As a result my homemade spaghetti sauce has a mild bite to it, which southwesterners appreciate!

Like most home farmers I love to pick my ears of corn just as they are fully ripe.  If some of them escape my notice they can start to dry out a bit…or sometimes a lot.  That’s ok. When I find those I just let them continue to dry out until I am ready to use them.  Then I shuck them and cut the kernels off and add them to homemade soups and stews.

Potatoes and carrots can be left in the ground long after the tops die back.  A mild freeze late in fall won’t usually hurt the ones that have a few inches of dirt over the top, but get them out of the ground before a hard freeze or they’ll turn black – especially the potatoes. Onions and garlic can just stay where they are all winter until I want to use them.

Your home kitchen garden is a great way to ensure your family has access to the best meals with the best ingredients.  Picking and preserving foods at the peak of ripeness is possible with a little forethought!


Averting a Turkey Disaster!

As a canner and food preserver I love the holidays.  The stores are so full of end of season produce that the prices drop way down – especially the prices for turkey!   Besides the one you plan to service on Thanksgiving or Christmas, I like to grab a couple extra.  I used to put them in the freezer, then one winter my freezer died – with 6 big turkeys inside!

Time to use a method of preservation less dependent on technology!

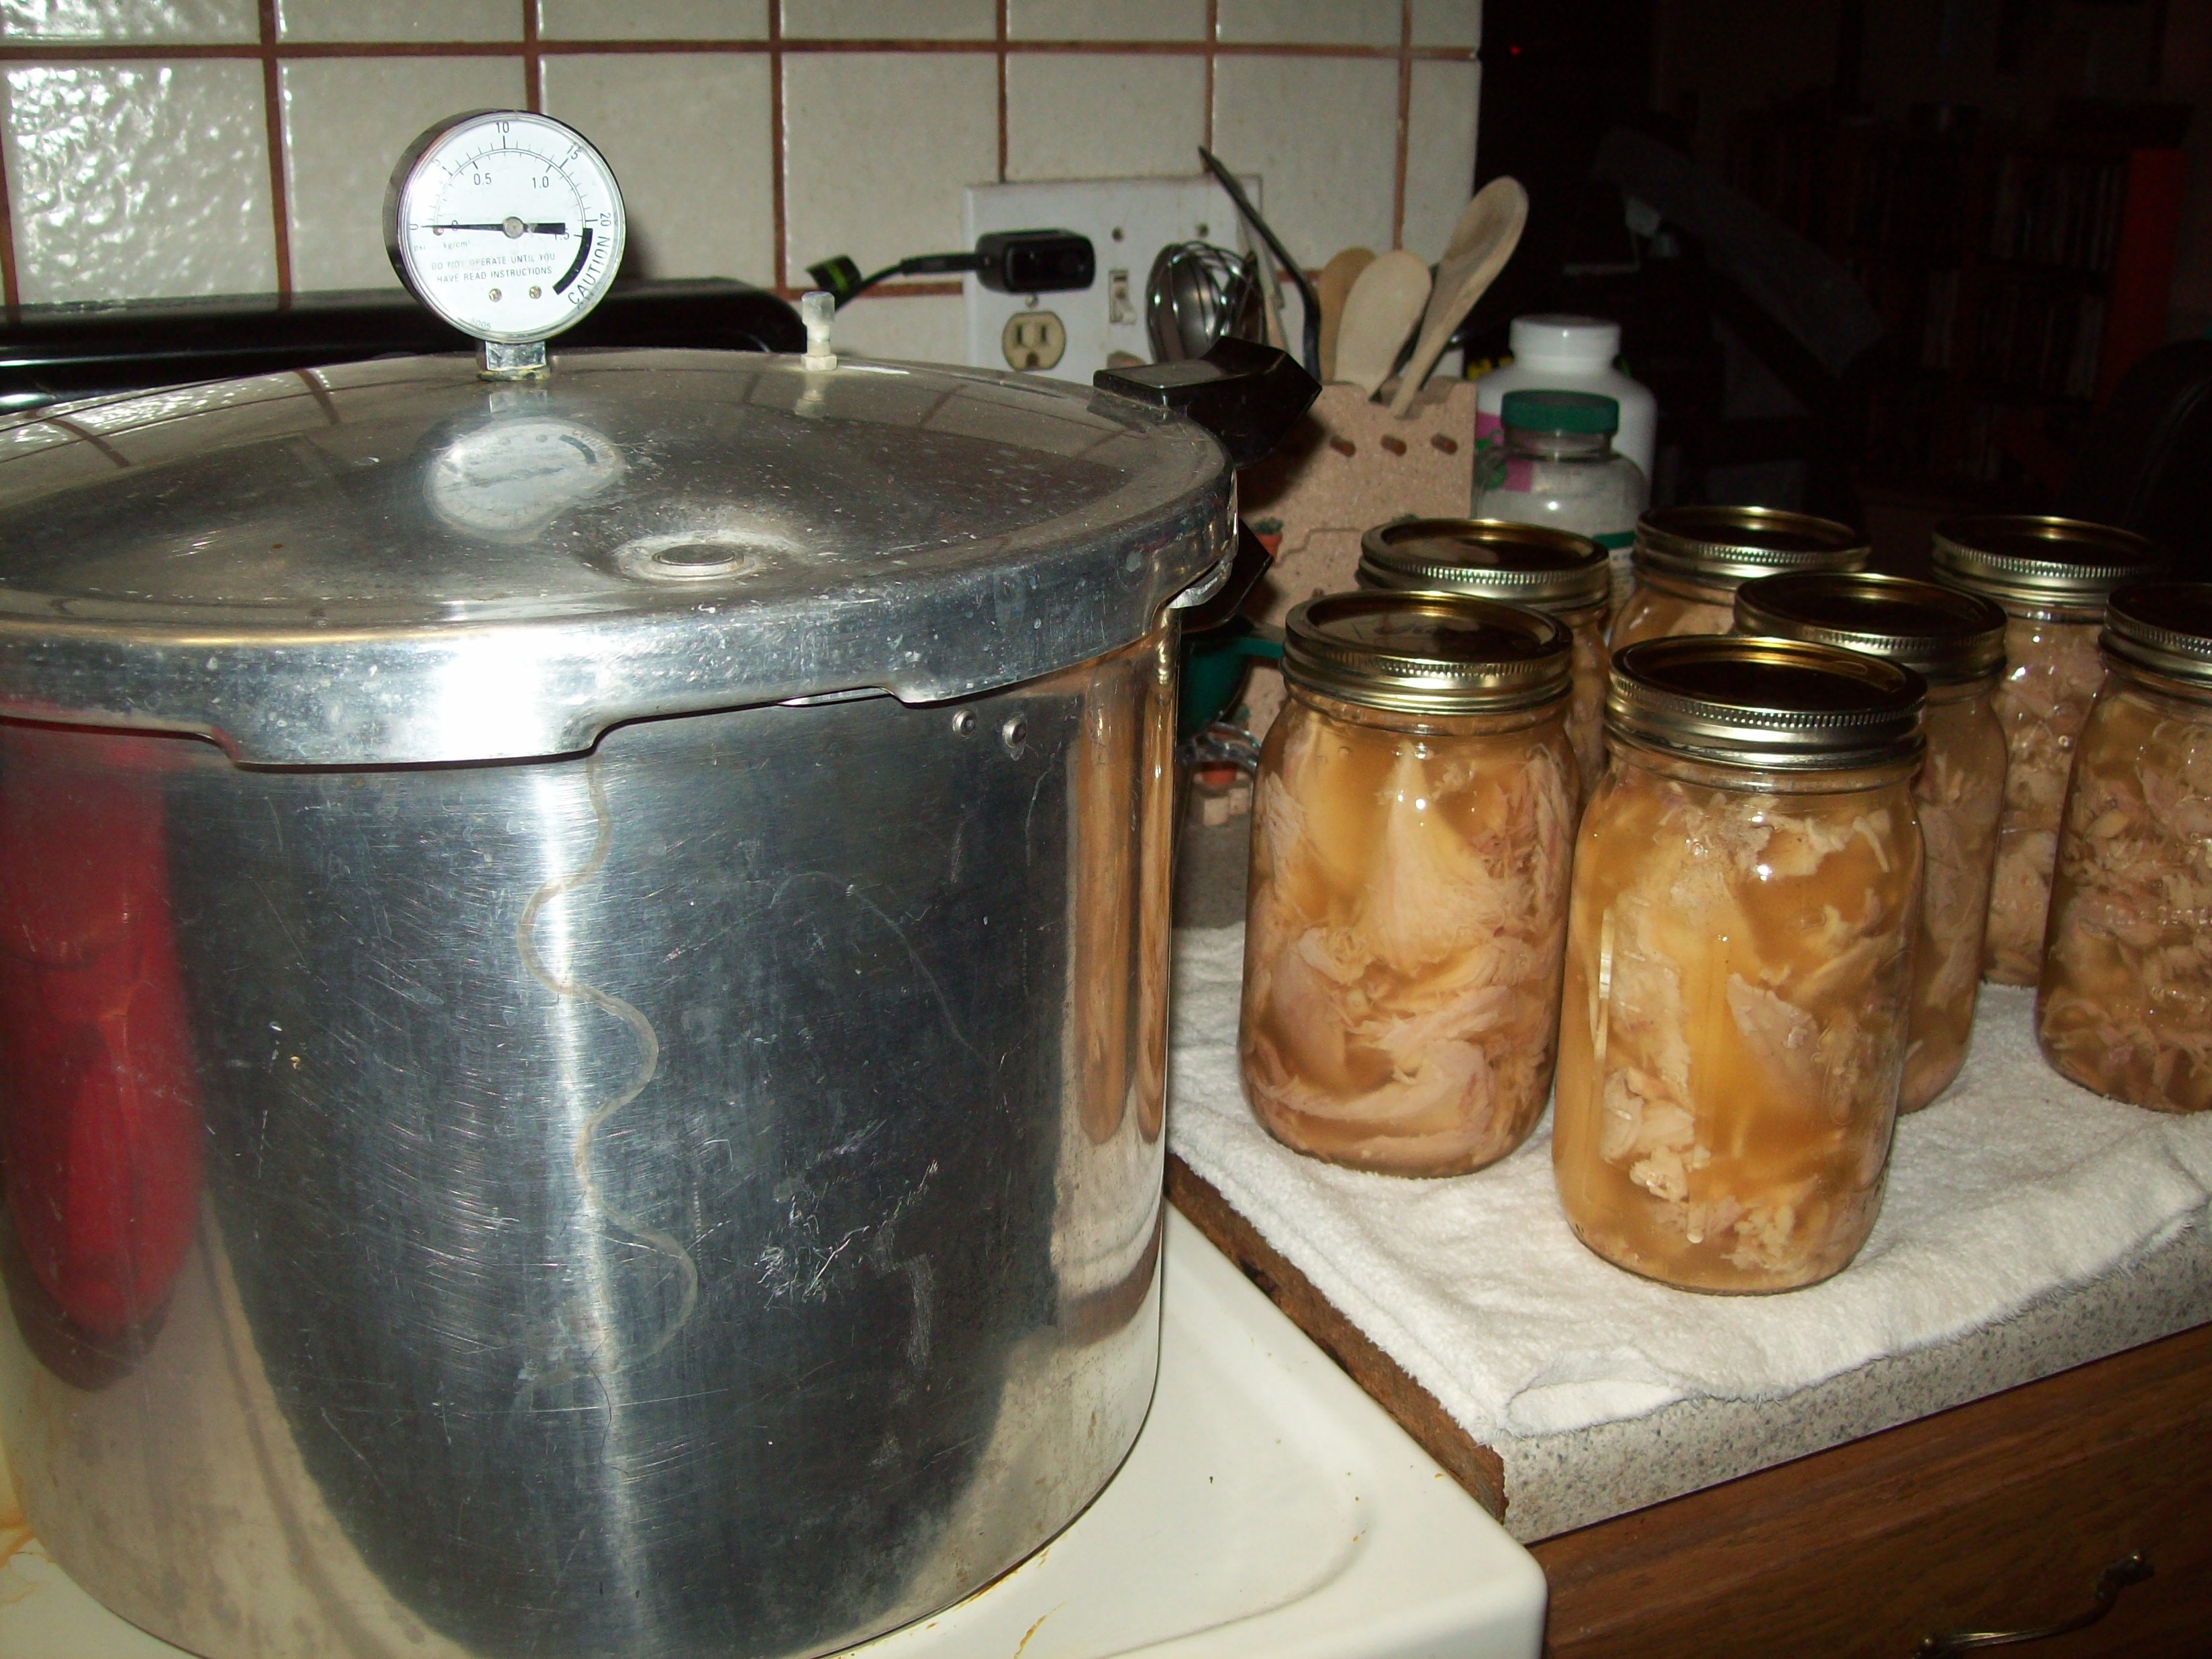
Out came the pressure canner and the roasting pans.  One turkey was placed in the sink to thaw fast in cool water.  The rest were kept in the freezer to stay as cold as possible.  As each went into the oven, another was tossed in the sink.

Each one was roasted then set out to cool.  Once it was cool I turned Aunt Judy loose.  That woman grew up in the depression and can strip a turkey right down to the gobble.  We separated the meaty parts into the stuff that was good for canning and we set aside the skins and uglier looking meats for dog food.  The broth and chopped meats were tossed in a really big stockpot set on low.

Luckily we had boxes of Mason and Ball canning jars out in the shed.  They were washed up and the first set was tossed into the canning kettle full of tap heated water.  You can add a couple inches of water on the bottom of the pot and turn on the heat.  Add a little vinegar to the mix to keep the jars sparkling and boil them to sterilize.

Once the jars and the chopped turkey meat are all boiling you can take each jar out one at a time.  Empty the hot water out and fill the jar with chopped turkey and broth.  When all the jars are full and sitting back in the canner, seal it up and turn up the heat.  Even after doing for 30 years I pull out the Ball Canning Manual to check on how long each jar should be processed and at what pressure setting.

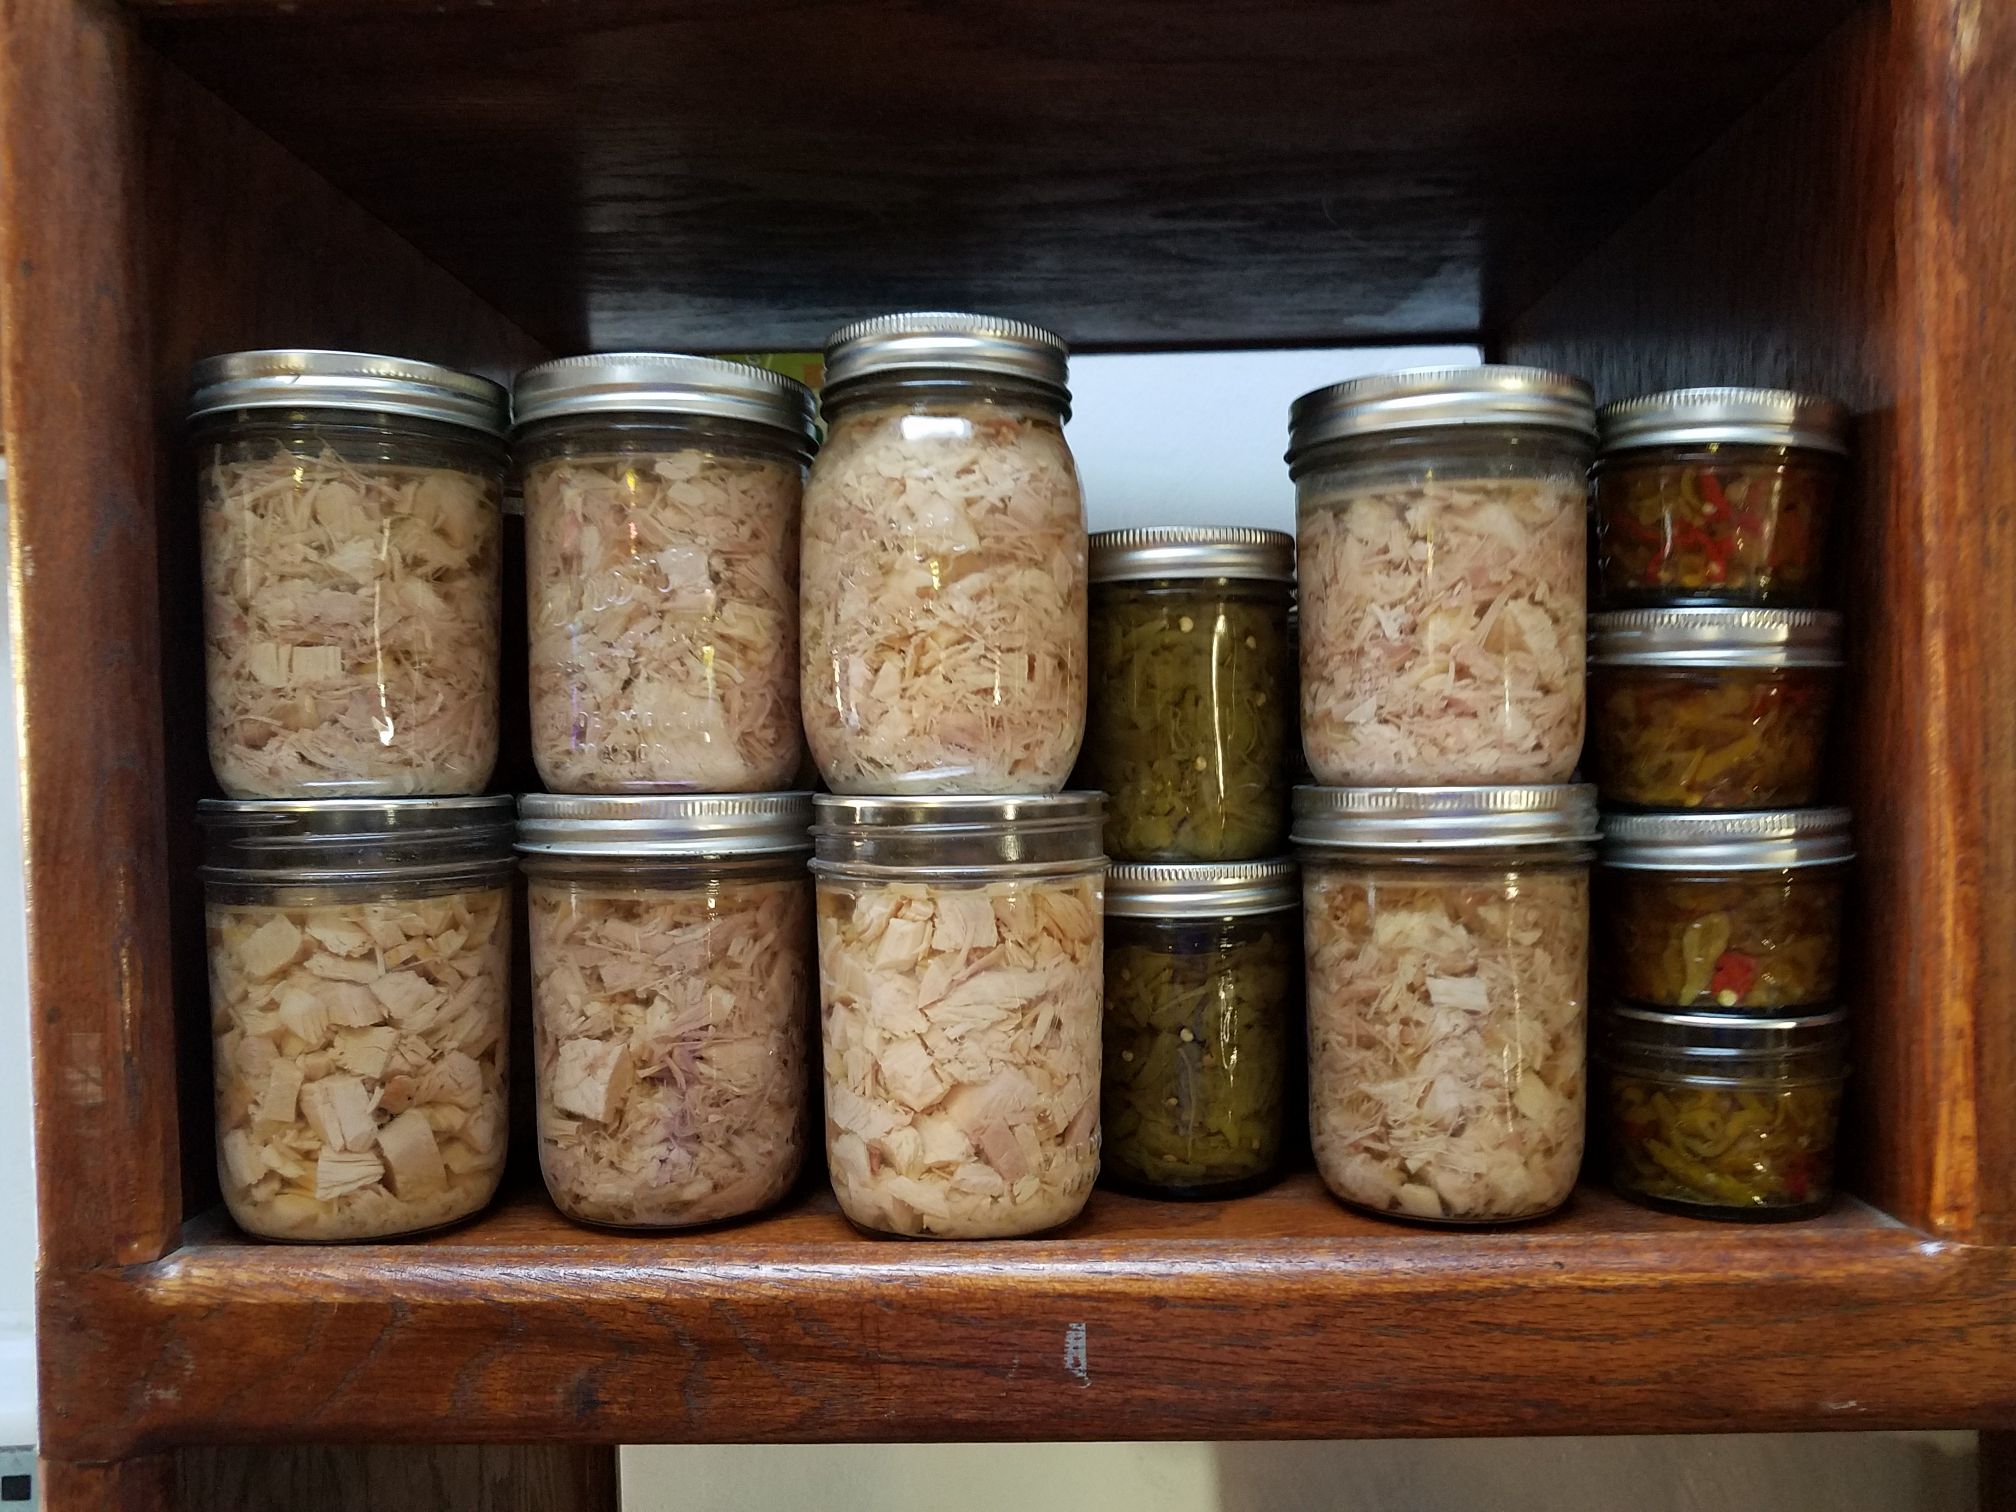
Obviously it took all day and part of the night to finish all six turkeys, and towards the end we decided that the last turkey should be the basis of some good turkey soup.  We added peas, carrots, spices, onion and potatoes to the last set of jars in the canning kettle.

After that we still had a bunch of what I call the “ugly” looking but edible portions of the turkey left.  This makes some tasty treats for Fido.  I tossed these into my food processor.  Most canned dog foods contain vegetables of some kind – a dense doggie stew.  Again I added a few carrots and peas to the mix.  The last canning session produced 7 pints of dog food.  What was left after that the dogs had with their dinner that night.

Each turkey produced 8 pints or 4 quarts of chopped turkey with broth and 1 pint of dog food.  Enough to make a LOT of Green Chili Turkey Enchiladas!


Creating Microclimates


Creating Microclimates for High Desert Gardening

  As an aviation weather briefer I have a lot of knowledge of weather in general.  When I started gardening in the High Desert I discovered that paying attention to weather variations and creating microclimates made a huge difference in how well my garden does.

High Desert gardening combines a dry climate with the effects of high altitude on plants and animals.  In any given high desert area you can have wildly varying climates within a 30 mile radius.  In the big scheme of things winds generally flow from west to east across the United States, but mountains can deflect that activity.  Most valleys will be colder and moister than the plains.

Take New Mexico for instance. Most rain is carried to New Mexico on winds above 20,000 feet from the Pacific Ocean – a long way to travel, so the city may be dry for 6 to 8 months of the year.  Only from July to mid-September do the weather patterns alter – a Low Pressure over the Baja combined with a High Pressure on the Gulf forces moisture to collide from both directions over New Mexico.

This moisture does not flow in frontal activity – rather it drifts in at 14,000 feet or above and hangs invisibly as humidity until early afternoons when heat flows from the desert up the mountains and pierces the layers of moisture laden air up above, generating thunderstorms.   The storms are driven by the steering winds at upper altitudes – never in the exact same direction each day.  So from dawn to 11am you have clear skies.  From 11am to 2pm you see fast upward development of fluffy cumulus, from 2pm to sunset there will be thunderstorms somewhere in the state – then at sunset the storms dissipate back into the atmosphere.

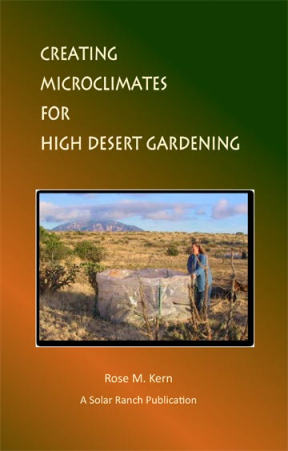
The airport at Albuquerque, New Mexico sits at 5,355 feet above sea level – over a mile.  Areas of the city are as low as where I live in the Rio Grande valley at 4,980 feet, to the foothills out east at 6,000 feet.  The top of the mountain on the east side is 10,678 feet.  The first challenge to new residents is the reduced amount of oxygen here, the second is the thinner blanket of air between us and the sun.

Many seed packages – like tomatoes – state unequivocally that these plants must be given full sun in order to grow the best.  The people writing these instructions are mostly from places like Michigan, Iowa or maybe Maine.  Even in totally clear skies, those places have 5,000 feet more air between the ground and the sun – which is HUGE.

When I first came to Albuquerque I went to my daughter’s Little League game one day wearing a swimsuit top and shorts and a hat.  The temperature was a nice 75 degrees.  Back in Indiana I never bothered with sunscreen, so I didn’t think I would need it here.   I sat with the sun at my back for about 2.5 hours – and slept on ice packs for the next two days.  The blistering was my first lesson in the effects of thin air on living surfaces.

Another effect is that thin air does not retain heat like the air at lower altitudes.  Temperatures can soar into the mid 90’s during the day, but every night they drop into the 60’s and sometimes lower.  In winter conditions this means that except when a rogue front drops in, the coldest nights will drop below freezing, but the temperature will normally surge up into the 50’s and 60’s during the days.

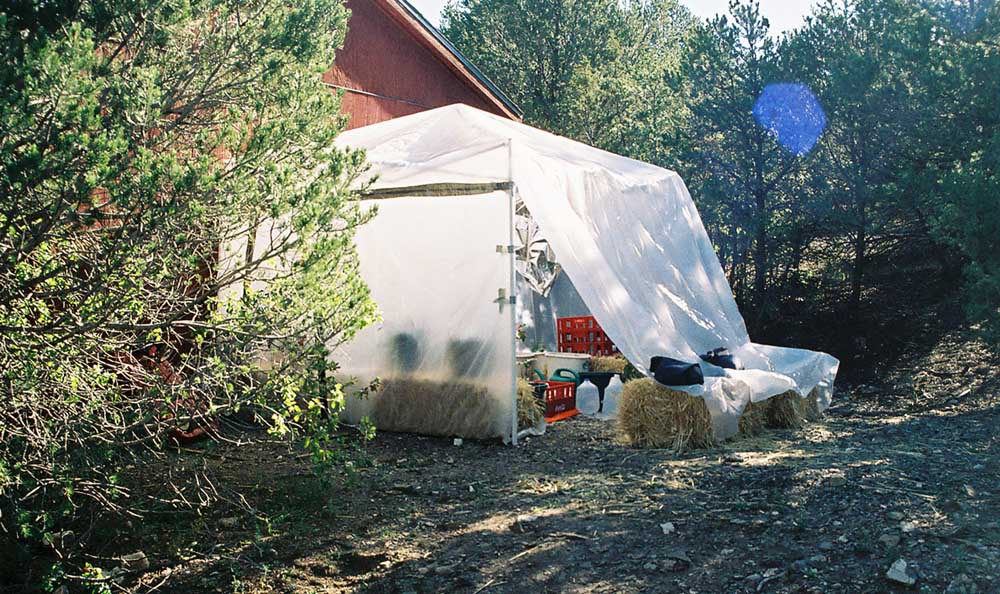
Most high desert residents deliberately create drought tolerant landscaping around their homes, but some of us like to be able to grow our own vegetables.  With all these extremes in temperature and moisture, the best chance for success you can give your plants is to create microclimates which help to even out the growing environment.

This year I put up a canopy above my tomato and green chili beds.  A control bed next to it had no canopy.  They were equally watered.  The beds that got shade for a portion of the day produced far larger more prolific plants.  This is also beneficial when you get that rogue thunderstorm with large hail – not as much damage occurs.

My onsite weather station has measured some of the spring winds here at 40+ mph.  Observing this I set up several “wind blocks” on the west side of my plants.  The wire fencing on the west side of the house now has plastic trellising to help block the force.   I set up a four foot cinderblock wall that is only six feet wide a couple feet west of my beehive for the same reason. It also mitigates heat from the late afternoon sun.

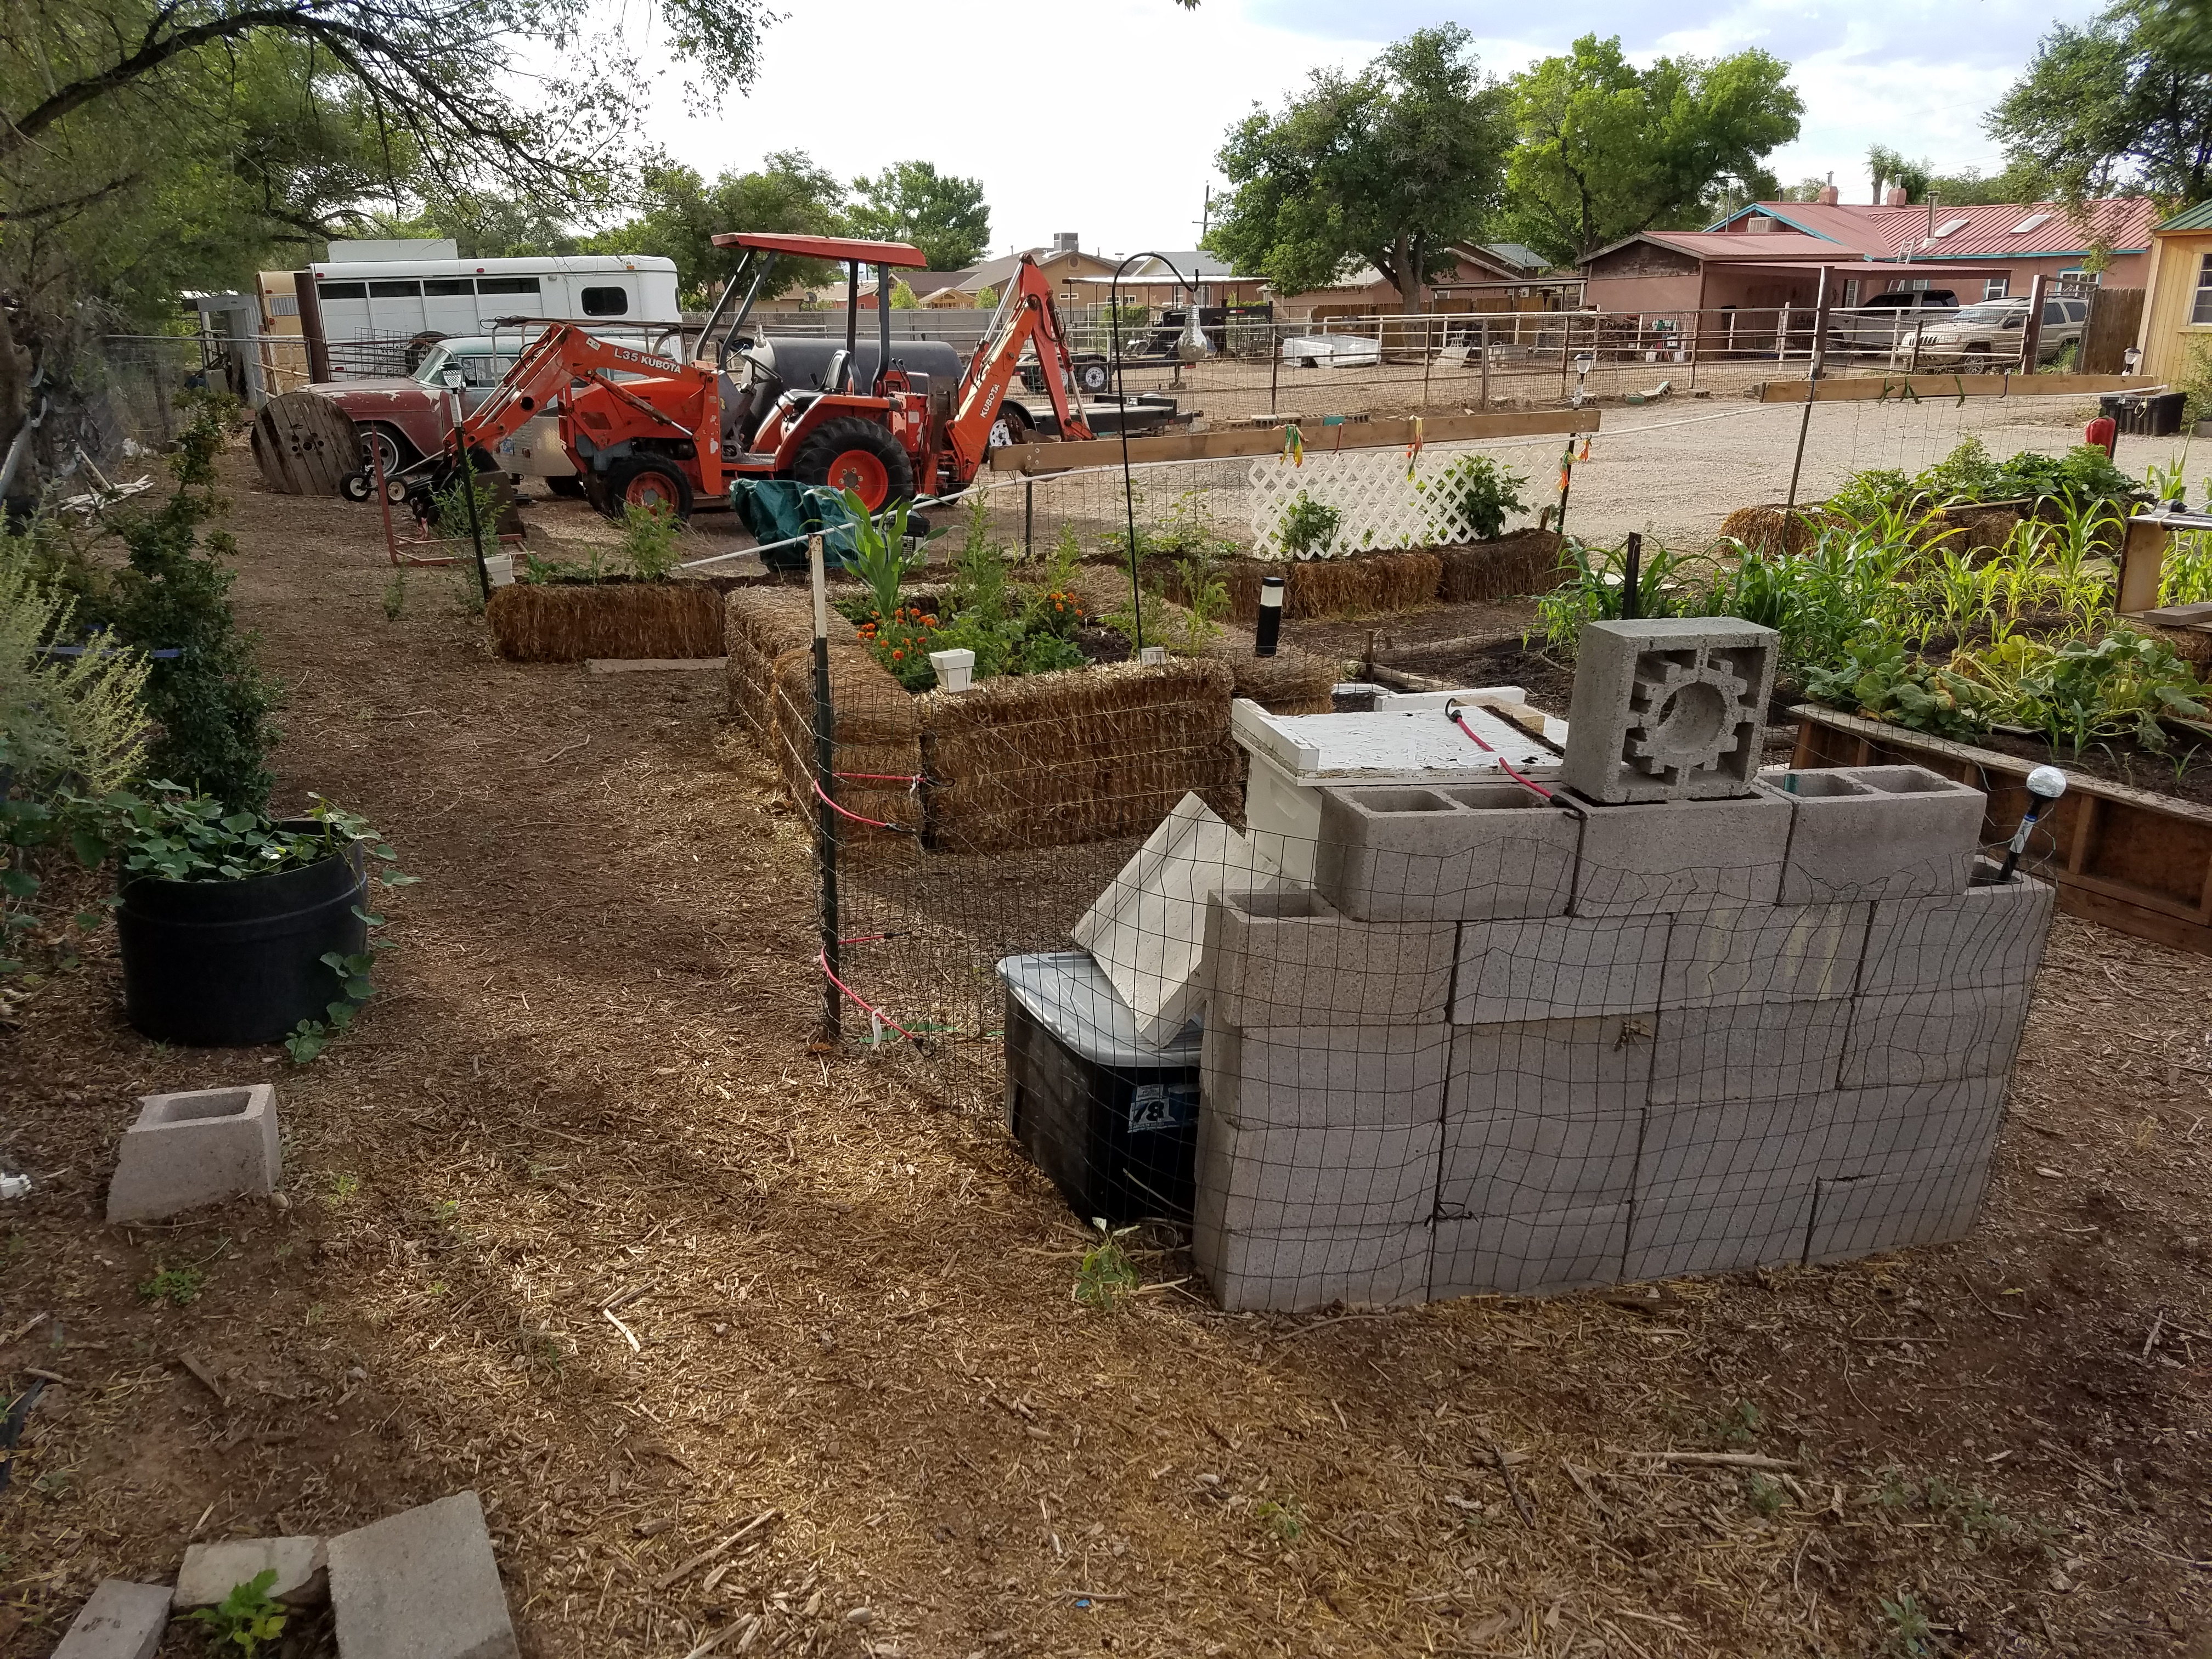
Creating a microclimatic environment can also help plants get started early in the spring.  I used six straw bales set up like a box, then filled the box about 2 feet deep with dirt and compost.  I’d started broccoli and cabbage from seed in February and by april they were almost 10 inches tall.  I put them into strawbale raised bed and was eating broccoli in June.  The cabbage took a little longer.  The nice part is that when it threatens to go below freezing for a long period of time you can throw a blanket on top.  This should work during the winter for any of the brassicas and many root crops.   After harvesting the broccoli I added another 6 inches of dirt then planted blue lake bush green beans.

So use your observations from this year’s growing season to plan for next year – and create your own microclimates!

To Order Creating Microclimates for High Desert Gardening 

Cost:   $12.00 + $2.25 shipping = $14.90

Three ways to order:

  1.   Send a payment through Paypal to:  rmkabq@swcp.com

2.         Send a check to: RMK Publications, PO Box 9761, Albuquerque, NM  87119

3.        or click here to order on Amazon. 


Becoming a Master Gardener

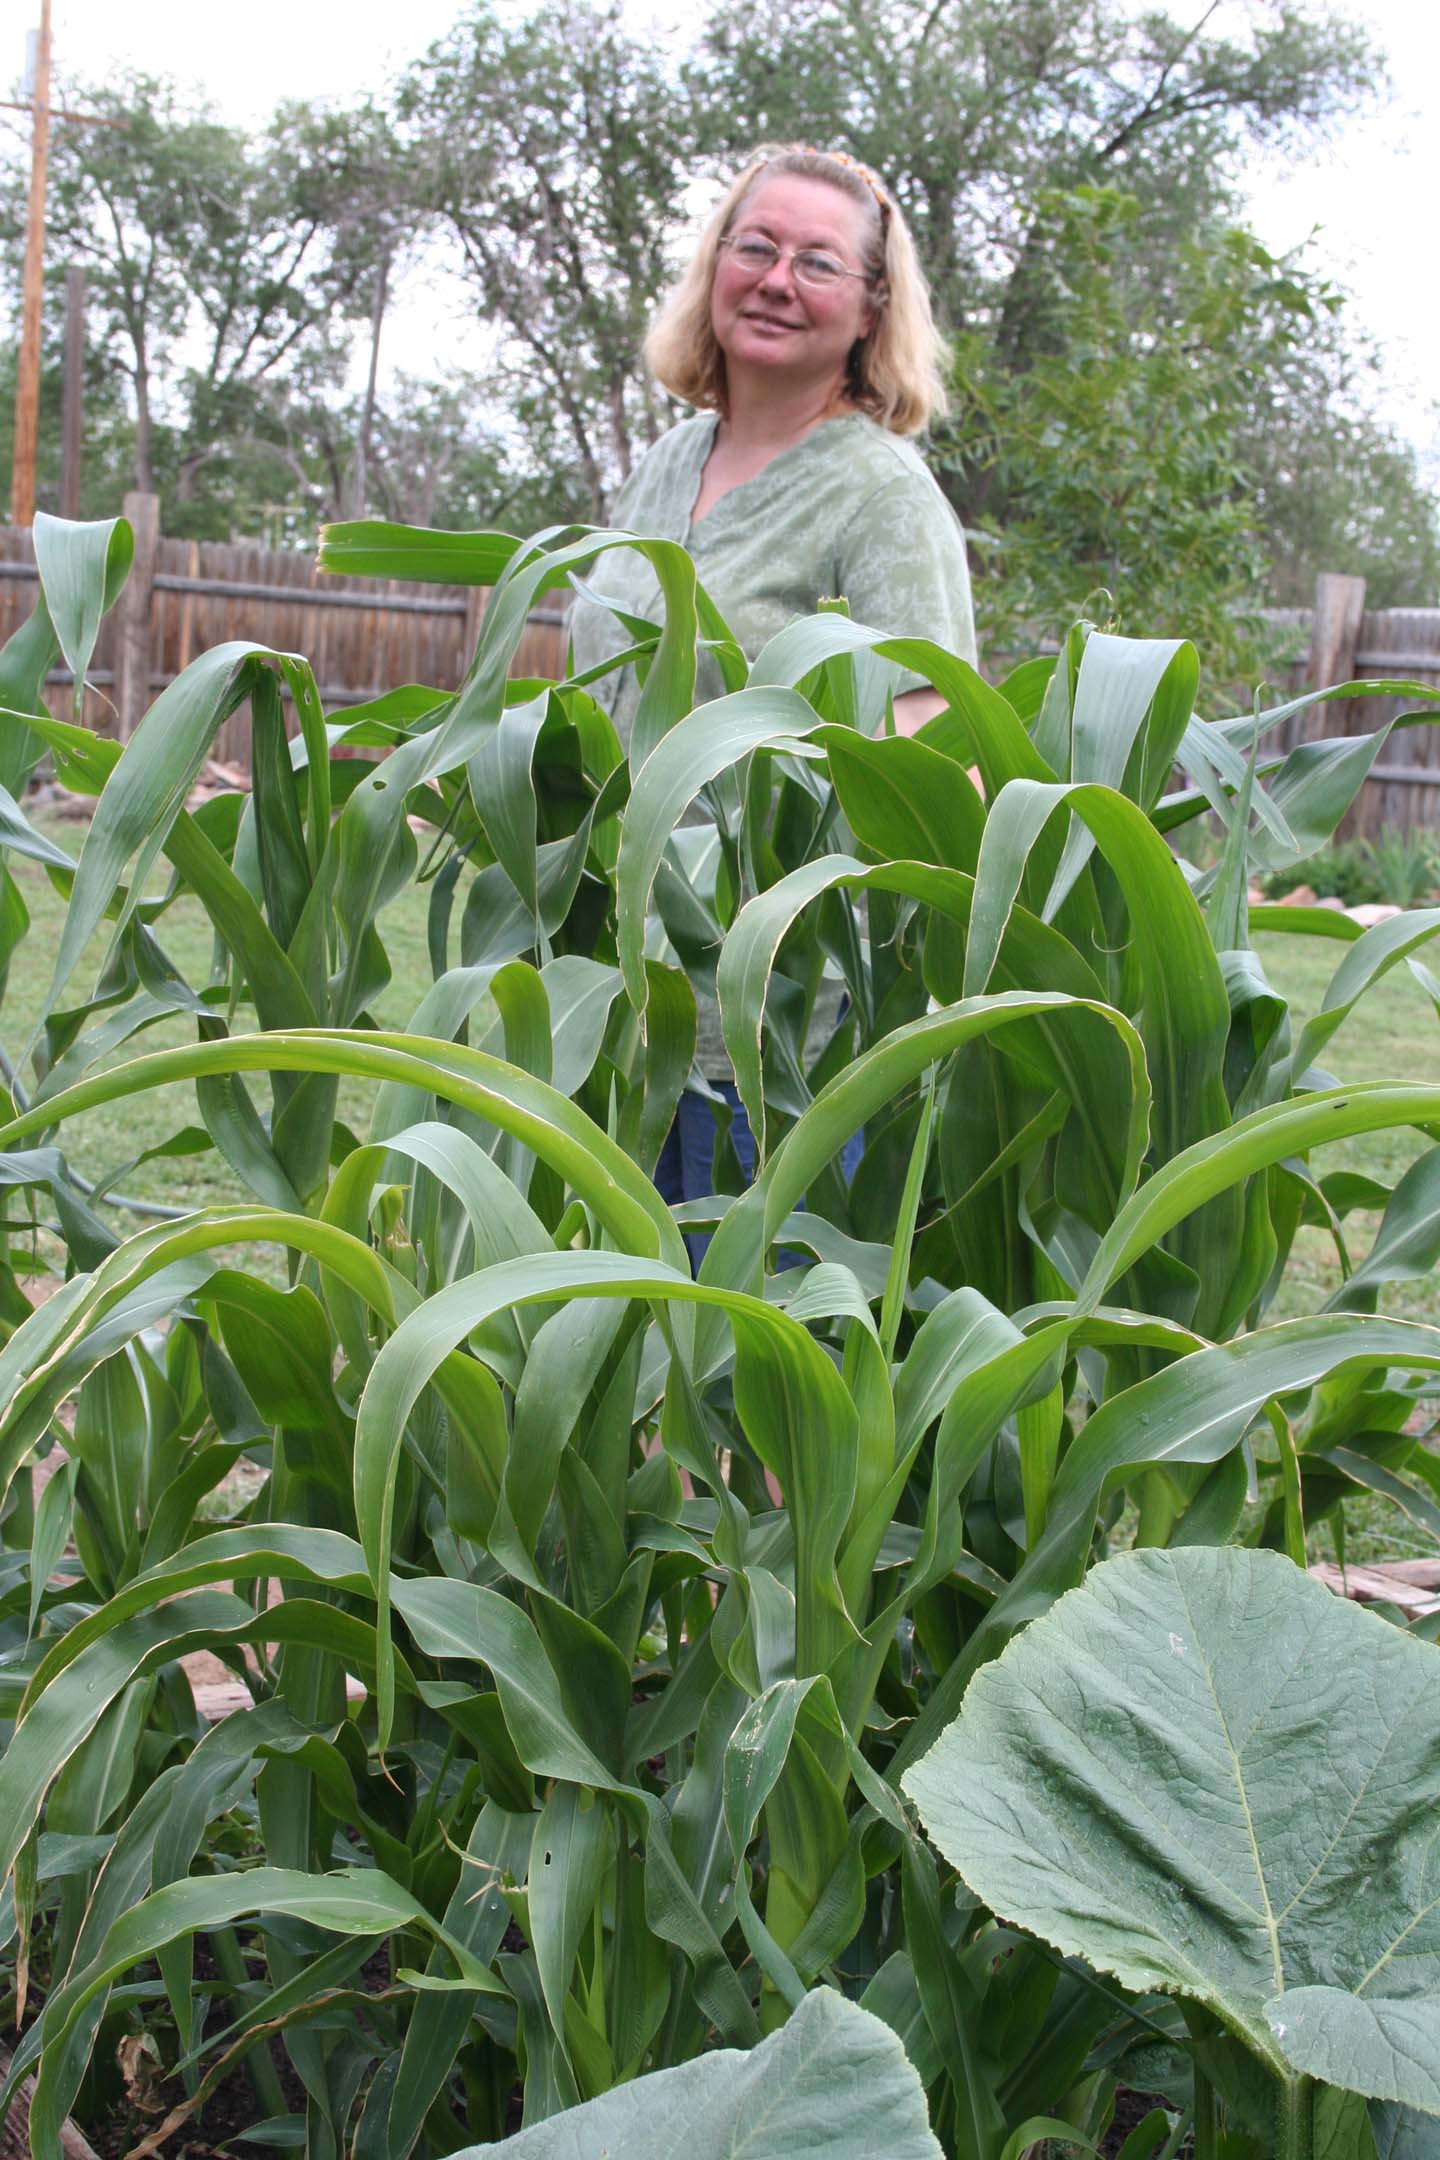
As a child of 10 in Indiana, my Dad taught me how to dig up a small backyard garden and plant some tomatoes and corn.  There was nothing he liked better than to sink his false teeth into the first red, ripe, juicy tomato of the season and munch away on fresh corn on the cob.   In Indiana you poked the seeds in the ground, added water and they grew.  It was easy

Then I moved to New Mexico.  Did you know that tomatoes do not like the soil or the water or the heat of Albuquerque?  They looked pathetic.  I had never really studied gardening, so I really did not understand what the heck was going on, but I did start reading everything I could.

In the course of my investigations I discovered that the Department of Agriculture (DOA) doesn’t just focus on farms and ranches, they also have a program that is aimed at backyard gardening in urban, suburban or rural environments.  They call it the Master Gardener (MG) program and it is offered through their County Extension offices in each state.

Not every county offers the program , but in those that do the county extension agent in association with a group of members sets up classes covering a wide range of information related to gardening.   In Albuquerque the classes are held for 10 weeks, 4 hours at a stretch, on Tuesday mornings beginning in January, when there is little one can do in the garden.

Interns learn about general topics such as Basic Soil Structure, and topics focused on the local area such as The Soils of Albuquerque.  (This is where I learned that what I was trying to grow my tomatoes in was in actuality decomposed granite).  The classes are taught by experts in each field – usually professors from your state’s agricultural university, or the county agents themselves.

Other topics included Plant Pathology, Entomology, Urban Forestry, Microclimates, and Pesticide Safety.  Once you get through those, there are some classes that discuss the basics of different kinds of plants, highlighting the ones that work well in the local area.  Roses love New Mexico, so do certain kinds of trees and shrubs.   We are taught what are the predominate weeds, and which weeds can become vectors for propagating plant diseases.

To create a good vegetable garden, including tomatoes and corn, you have to compost, compost, compost!  Regardless of what the seed packages say, tomatoes and several other veggies prefer partial shade to full sun, though the corn doesn’t care as long as it has water and compost.  The Albuquerque garden is about 5,000 feet closer to the sun than in Indiana.  The solar radiation is stronger here, so a little protection is appreciated by plants (and people!).

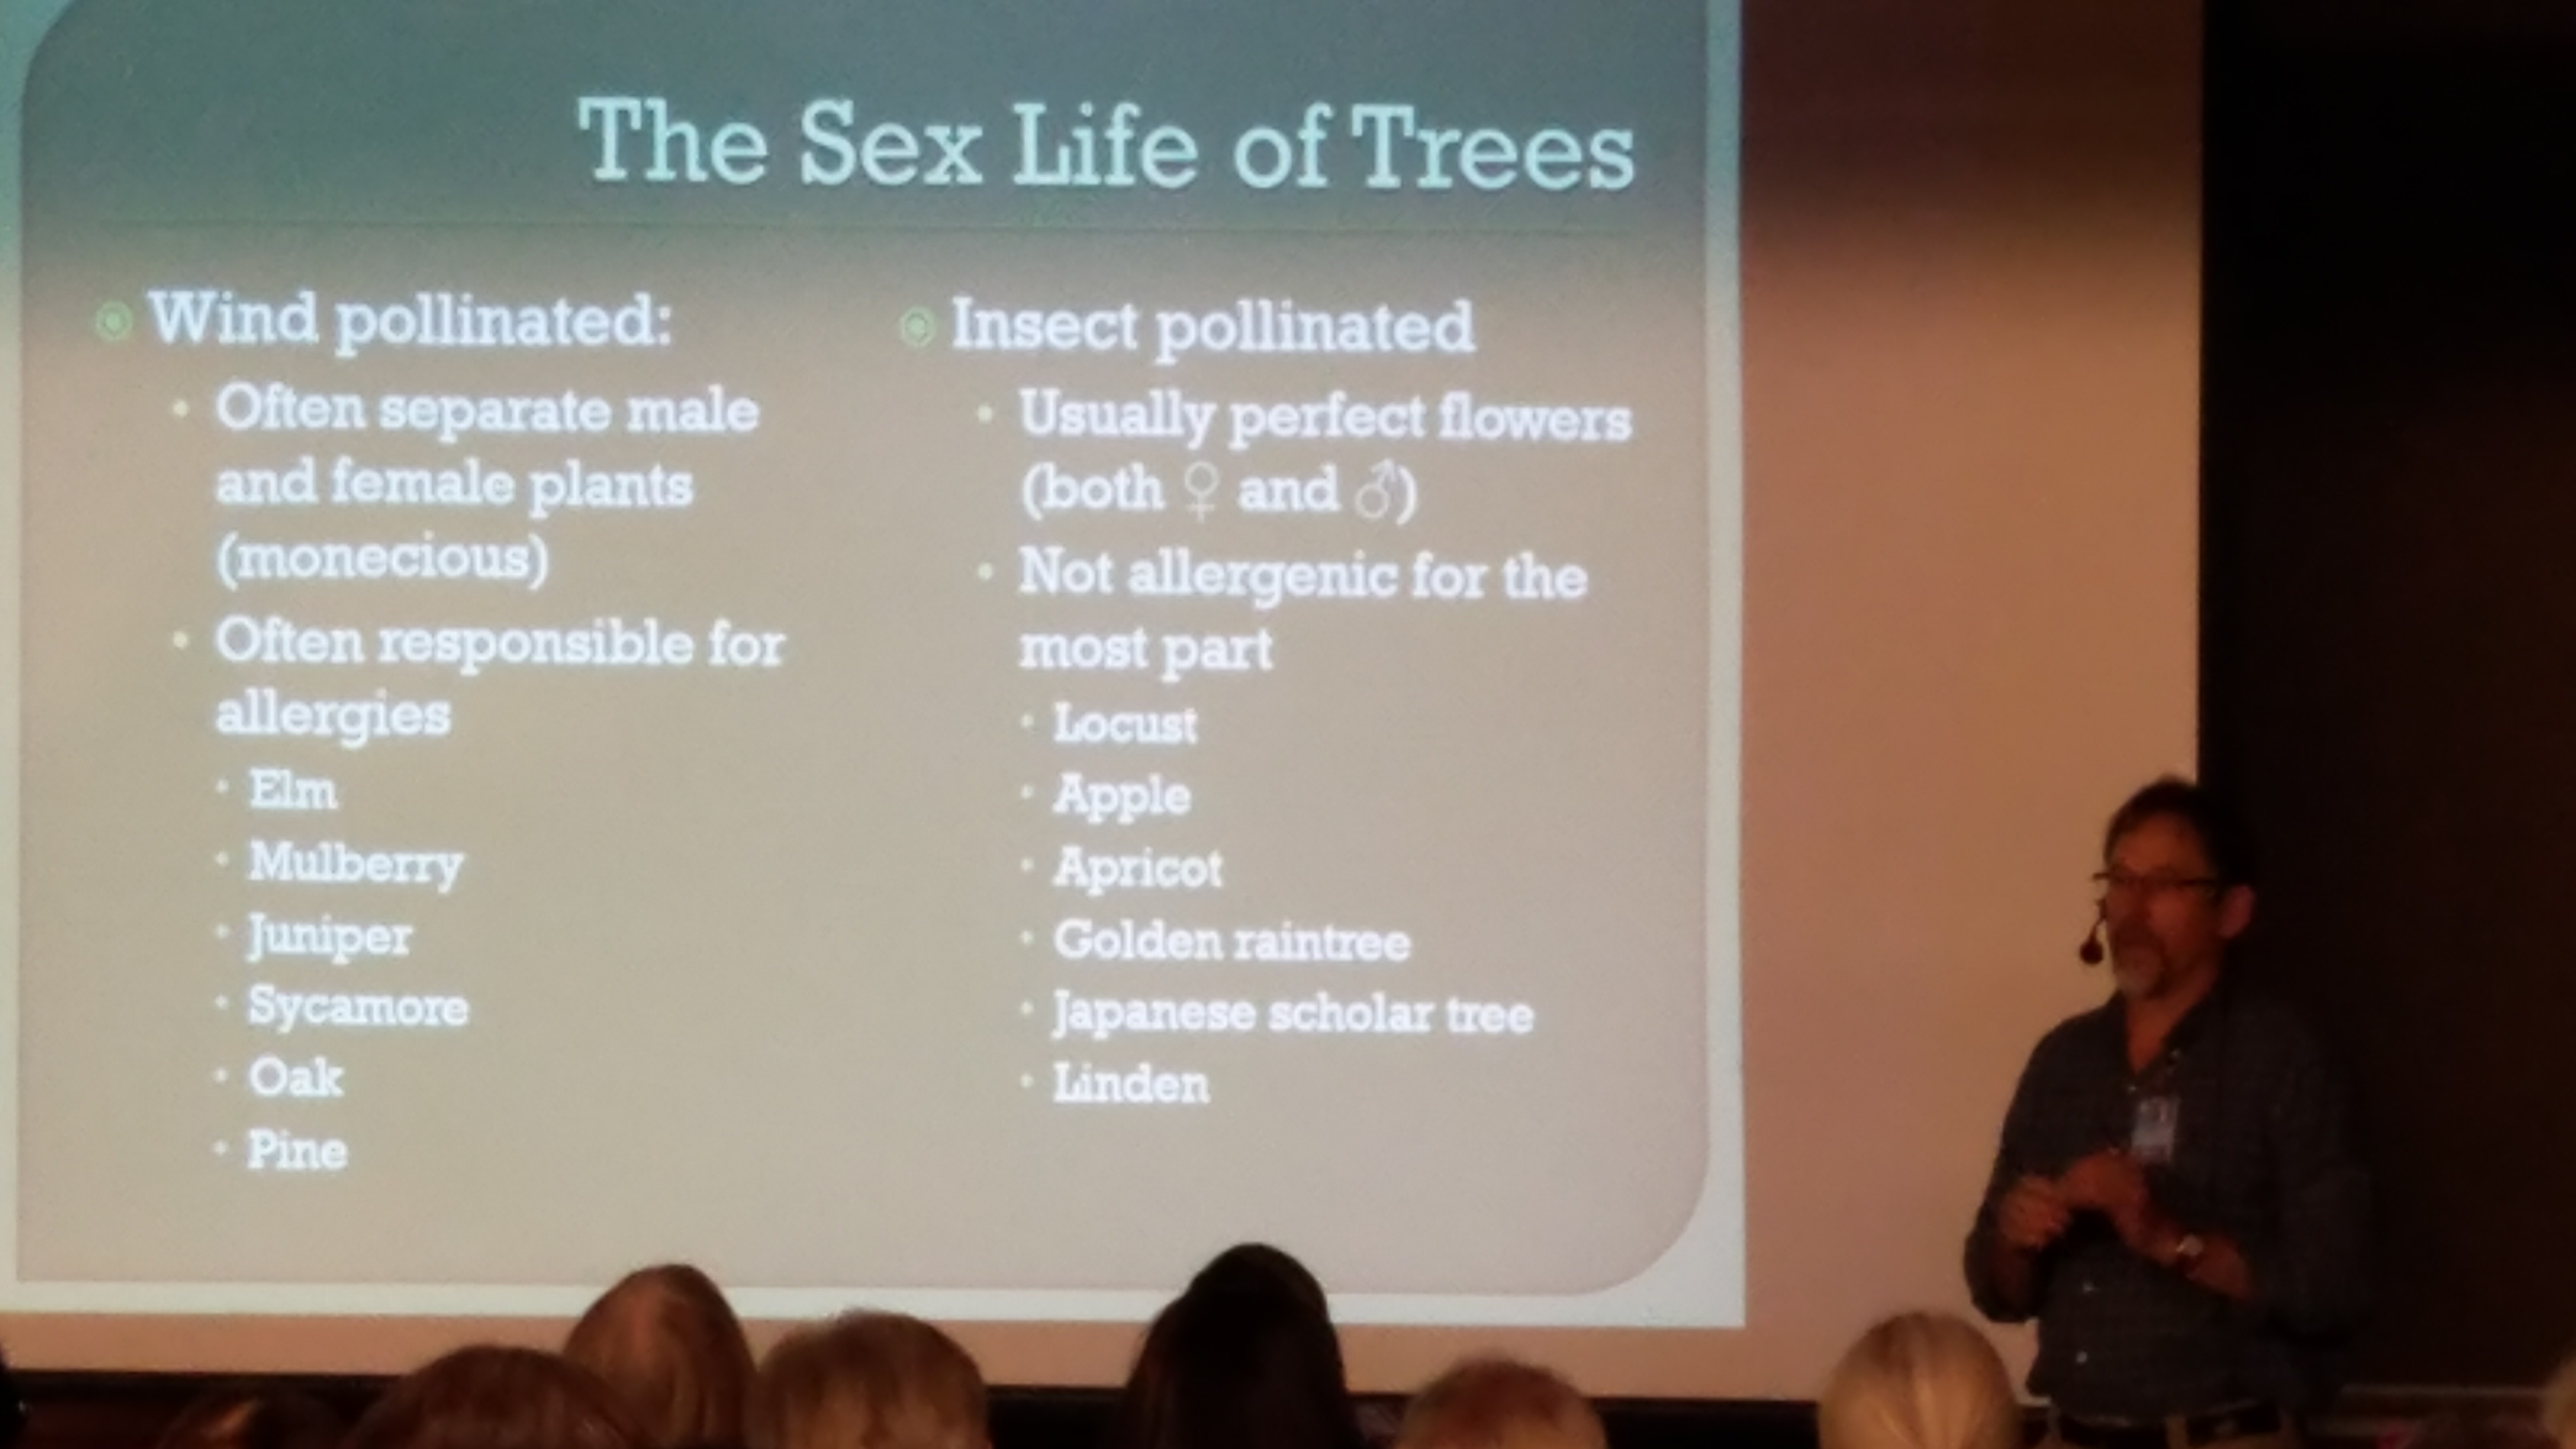
Fruit and nuts also need some extra help. Pecans, raspberries and blackberries love the New Mexico soils, but blueberries are and will always be an exercise in frustration.  Apples, Pears, Peaches, etc will grow here, but are happier in the northern mountains where they do not bloom too early.


There are even classes in Turf selection and management for those who want a spot of grass in the yard.  In the Xeriscape class we learn that you can have a lovely garden, you just need to use good judgement when it comes to your plant selections, and include some water saving options such as drip irrigation.

The program does not end with the classes.  To become an official Master Gardener you have to volunteer your time helping others in your area who are experiencing difficulties in their yards.  Each county across the nation has different requirements, but here in Bernalillo County (Albuquerque), we are required to spend at least 20 hours a year manning the garden hotlines, plus another 20 hours doing other approved volunteer work.

The Albuquerque Master Gardeners set up tables at local libraries and farmer’s markets, teach kids in the classrooms and through creating school gardens, work with ARCA to make lovely gardens in their group homes, and set up exhibits at the State Fair.  Some of them go to people’s houses to offer advice in landscaping.

The county extension agent uses the MG program as a filter.  Most of the agents are overwhelmed with calls, especially in larger communities.  Any questions that the Master Gardeners cannot answer or resolve are put through to the county agent.

The hotline and other volunteer duties truly expand your understanding of gardening, and you can end up fielding some really strange questions.  Do you know what is the most common problem in gardens in Albuquerque?  Overwatering.  People think that since it is a high desert climate, that a little water may be good, but more is better.  As a result, a lot of them drown their new planted trees.

Some people will bring tree limbs or leaves into the office itself to ask what is wrong with their plant.  One young man brought in one blade of grass and asked me what variety it was.  Yeah Right.  Fortunately he also brought some digital photos of the grass and the area it was planted in, so I could diagnose why he was having problems growing turf.

At the end of the season, after all the volunteer hours have been fulfilled, the intern earns the right to be called a Master Gardener.  Here in Albuquerque they are given a certificate, a shirt and a nice plastic Master Gardener nametag, which they are encouraged to wear at all MG events.

To keep the title, MG’s are required to volunteer at least 40 hours per year and take 6 of the classes that are held annually.  Each person must spend 20 hours on the hotline, which is manned from March through September and is the most important aspect of the program.

To find out if you have access to a Master Gardener program in your area, contact your county agricultural extention offices.  You could also Google “Master Gardeners” and your state.  Our local website is www.abqmastergardeners.org.


Suburban Homesteading

Greetings fellow suburbanites and backyard farmers!

Have you ever picked up a copy of a magazine like “Countryside” or “Mother Earth News” and wished you were set up to be totally self sufficient?  Being able to do for ourselves rather than always being dependant on society is a fundamental human need.  And at the same time many of us enjoy the convenience and diversity of experiences living near to towns and cities can offer.  Some need to be close to medical facilities, some have jobs in town and want to reduce their impact on the planet by using alternate forms of transportation, or just not have to drive a great distance.

Whatever your reason for staying relatively close to larger communities, you may be asking how do we become as self-sustaining as possible?  How can we create a healthy non-polluting personal environment?  How can we have the best of all worlds?

This website focuses on these questions and you will see many articles that may look like they came from a rural community related to construction, food preservation, organic gardening and much more.  My personal observations have been gathered over the years from living in the high desert, and since I am over 60 with the aches and pains earned honestly, I also have some tips and advice for older suburban homesteaders.

To Start With…

How much do you know about your property?  Or, if you are looking to buy a home what should you seek in your quest for self-sustainability?  Things you should assess include:

Property – Is there enough room for a garden?  Is it fenced?  Are there sheds or other structures outside? Is there a well?

Government restrictions –   Be sure you understand what you are allowed and not allowed to do in your community.  For instance, many counties in New Mexico and Colorado do not allow you to catch and use the rainwater coming off of your own roof!     Albuquerque is in Bernalillo County.  Although my half acre has an Albuquerque address, it is outside the city limits.  This means I abide by the laws of Bernalillo County without the added city regulations.  My property runs along an acequia (agricultural water ditch) only a quarter mile from the Rio Grande.  Although the house is on city water, I have a grandfathered well only 18 feet deep for gardening water.

Income Potential – What are the zoning restrictions in the neighborhood?  Most residential neighborhoods can house small businesses as long as there is no “foot” traffic.  The county and/or town government may have restrictions on the types of things people are allowed to manufacture on the property.

Critters – Does your town or county let you have backyard livestock?  Horses?  chickens?  Bees?  What is the limit on how many you can keep?

Transportation and Roads – Is your street kept up by the county or do you have to pay for private road maintenance?  Is there nearby access to buses, trams or railways?

Community – Is the area you want to live in friendly?  Are there known “drug houses” in the area?  Is there a neighborhood watch?

Apartments – If you need to live in an apartment, you may want to choose a lower floor with the balcony side facing south.  This offers more options for growing plants.  Although the upper floors may have better views, having that floor above you means your heating/cooling costs will be lower.

Trash – What’s the story for your trash – do you have to use a contractor specified by the county or are there options?  Is there a recycle program in the area?

Houses – What options does your house have for heating/cooling if the grid is down? Does the house have adequate pantry space to store food for a lengthy period of time?  Emergency supplies?  Is the house in an area that is subject to wildfire or floods?  If in the mountains is there space between the house and any fir trees in case of forest fires?

HOA’s – Most Home Owner’s Associations are nasty little pieces of work.  They are more concerned with everyone keeping their places neat, clean and exactly alike than with allowing any form of individuality.   One HOA in Plainfield, Indiana has nice big houses and lawns and they dictate what color christmas lights the residents are allowed to put up each year!  Read their rules carefully if you are wanting to buy in any area with an HOA.   Will they allow a vegetable garden at all?  Can you plant them in the front yard?  How about solar panels?  Wind? Can you set out a clothesline?

Whether you already have property or are looking for a place it is good to know the issues – what can you do and what might get you in trouble!


Intro to Solar Cooking

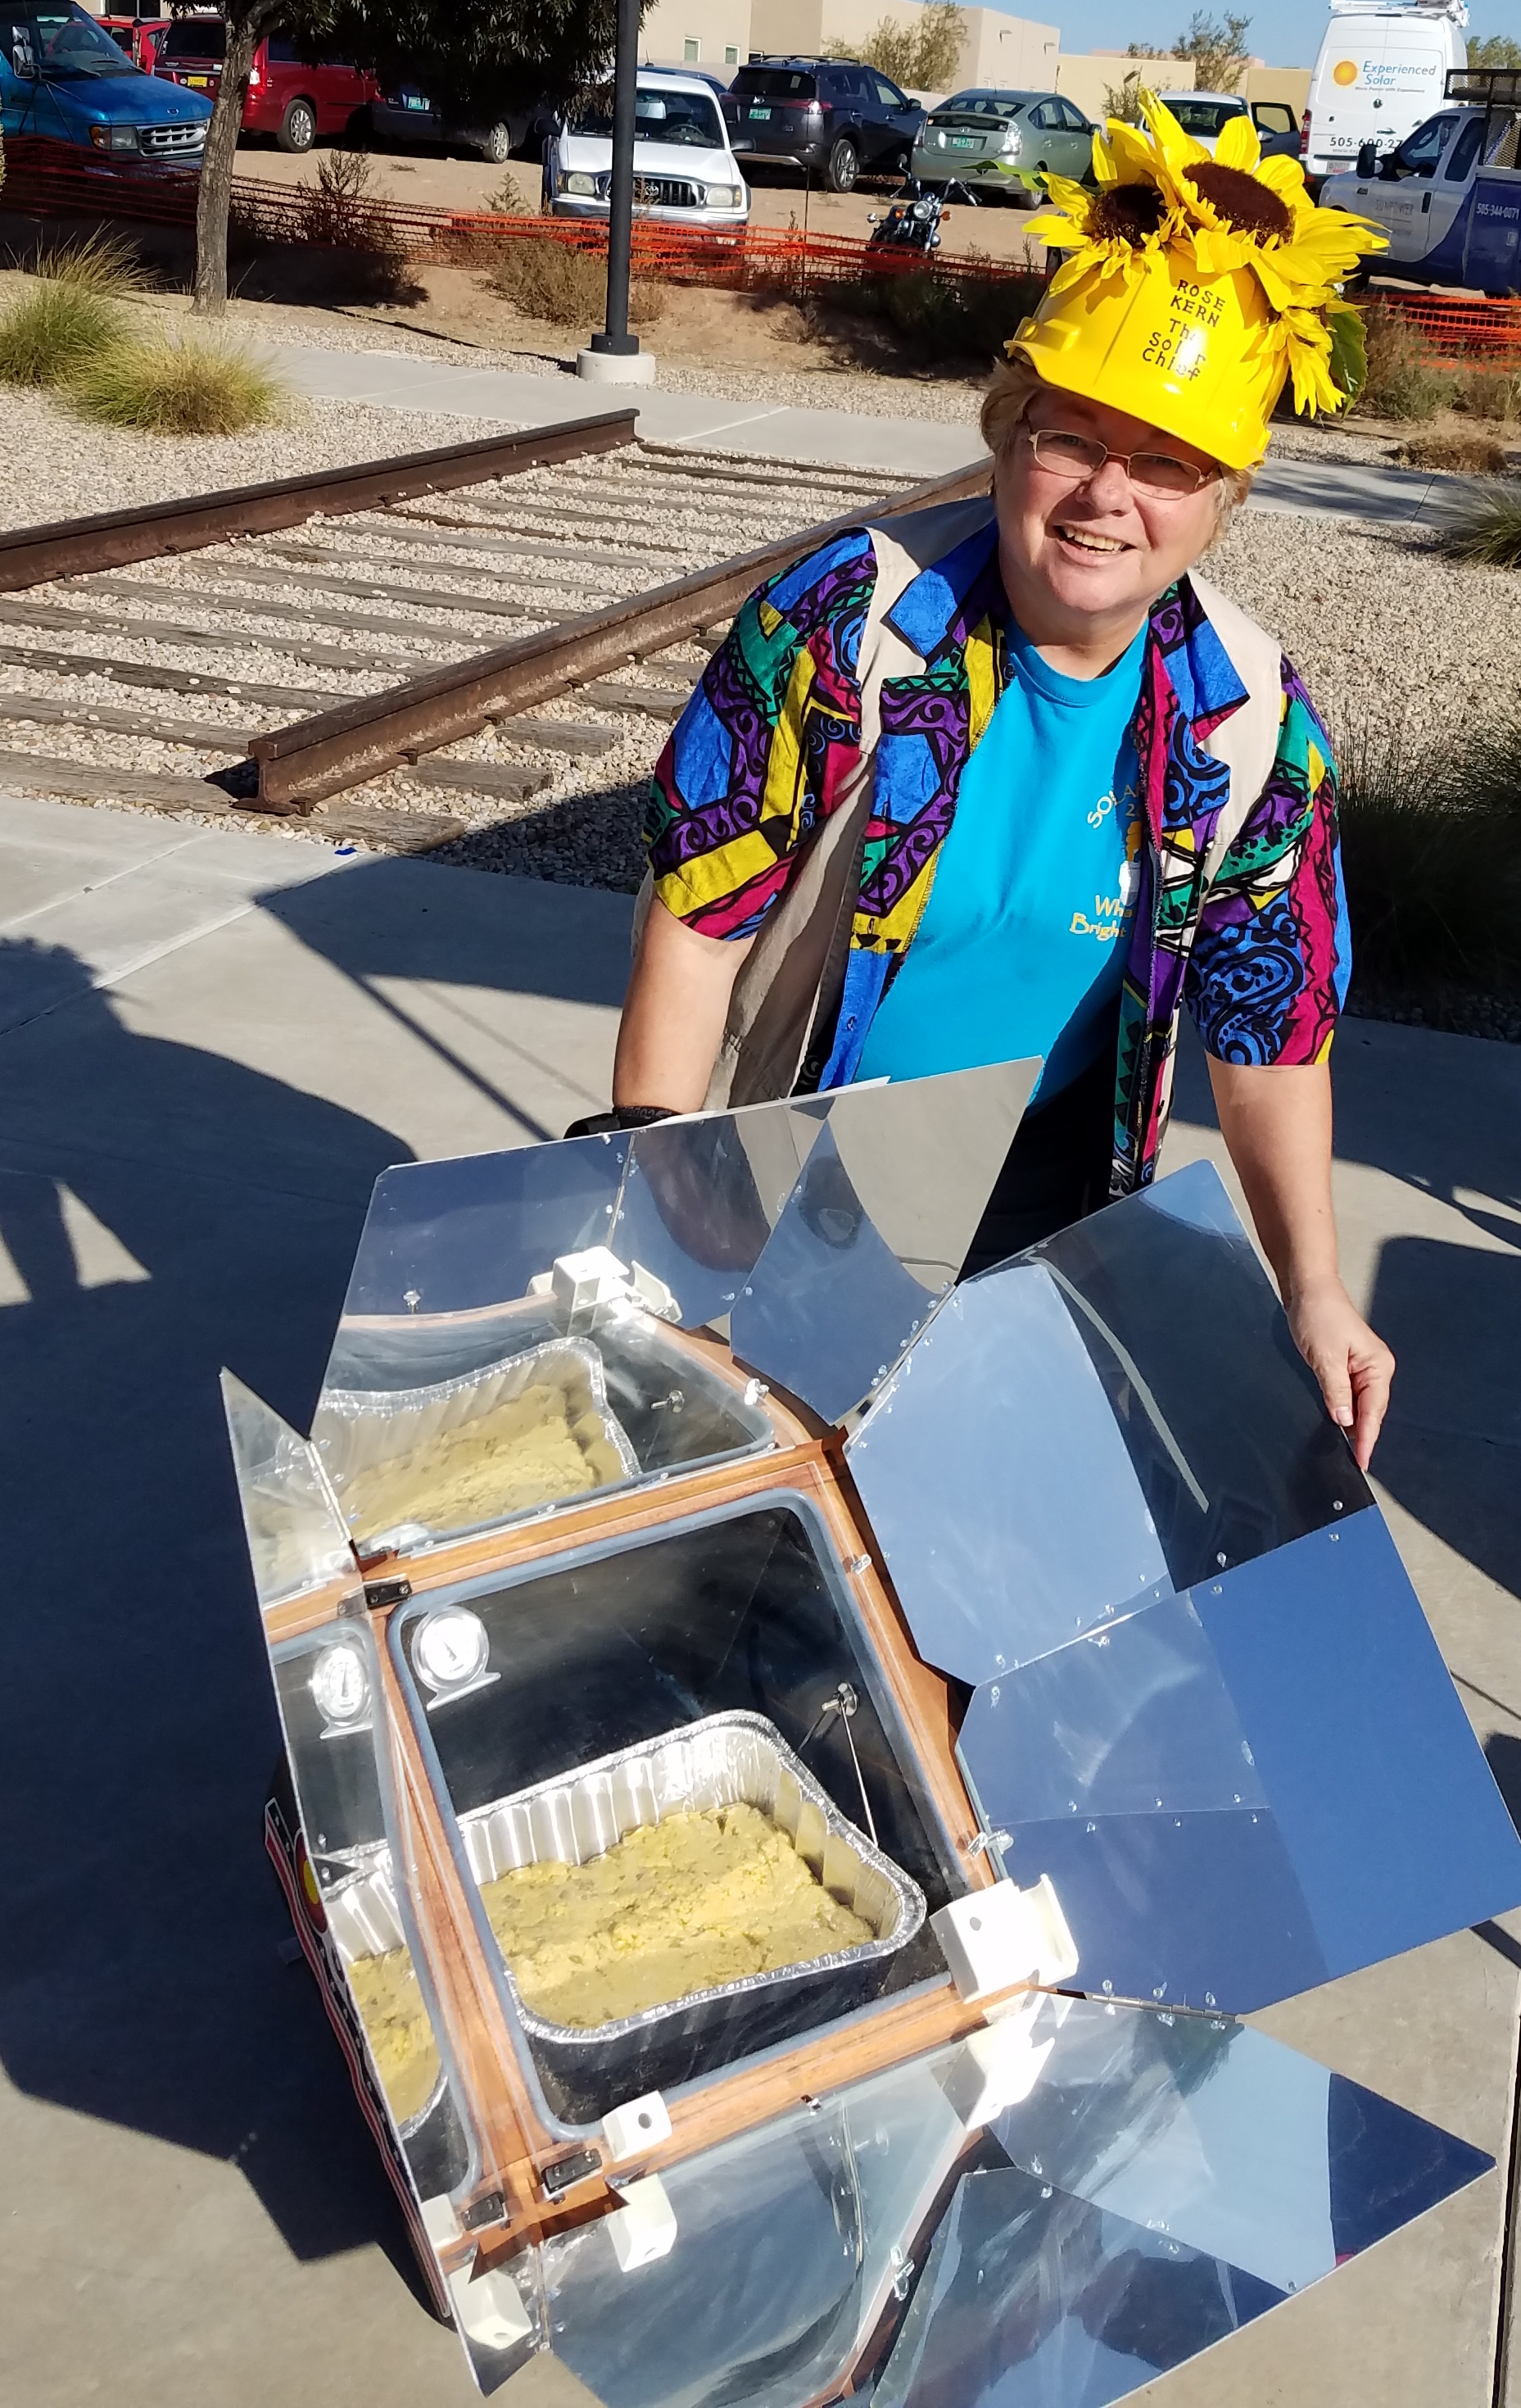
 When I was a kid, every summer the TV news folks would choose a very hot day to go downtown, spread aluminum foil on the County Courthouse steps and crack an egg onto it. They then proceeded to tell jokes about how hot it was. I don’t ever remember the egg getting cooked – but the image stayed with me.

35 years later I saw my first Solar Oven. It was sitting on the ground and contained a nicely browning turkey – in February. Solar Cookers have made a splash all over the world in the last 10 years. In many countries of Africa, there are villages that have little in the way of firewood for cooking, Sun Cookers, International is a non-profit group that raises money to bring Sun Ovens made from foil covered cardboard with oven roasting bags to these areas. A pot of rice and beans placed into this arrangement will cook food for the family without the women having to spend hours searching for a few small sticks of firewood or dried dung.

There is a town just outside Mexico City wherein the women’s association has built a large solar oven. Panadaria Solaria is the name of their bakery, which supplies most of the village’s bread.

A simple solar oven is made from lining a shoebox with aluminum. Paint the outside of a quart canning jar Black. You can put hotdogs or water or anything that needs warmed inside the jar. Place the jar inside the box and tilt it towards the sun. On a sunny day it should only take 15 to 20 minutes for it to be ready.

There are many plans for building oven sized solar cookers from cardboard or wood, and there are several kinds of solar cookers that are considered to be serious appliances. The Global Sun Oven is one such appliance. It has petal-like reflectors and tempered glass doors. It can reach 425 degrees in summer, and even in winter will cook the evening meal – as long as there is sun! The beauty of this one is that it folds up quickly, weighs only 21 pounds and is easily transportable. It can be used during camping when the forest service won’t even allow camp stoves. It contains a temperature gauge and a suspended platform that keeps food upright even when the box is tilted to gather maximum sunlight.

There are also several parabolic cookers – curved surfaces that reflect light toward a pot suspended at the point where the light is focused. These can achieve higher temperature, and are very good for frying. They usually are not as easily portable as the box cookers, but do very well at boiling the morning coffee!

 Although most of us in the United States don’t have the problems faced by the women in Africa, there are several advantages in using Solar Cookers in the sunny Southwest. It reduces the amount of gas or electricity we use with regular stoves – lowering the utility bill. It reduces the amount of heat we generate when using conventional stoves indoors – so our air conditioning does not have to blow out the heat – again reducing the utility bills.

There are subtle and important differences between a solar oven and the electric or gas ovens we find in most kitchens. One involves the temperature fluctuation during cooking. This is especially important at lower temperatures.

There are many ways to build homemade solar cookers and I have listed some websites where you can get that information below along with locations where you can buy the professionally built solar cookers. Most of these books are focused on the creation and promotion of solar cooking. They contain recipes which are usually simple, though tasty, in nature.

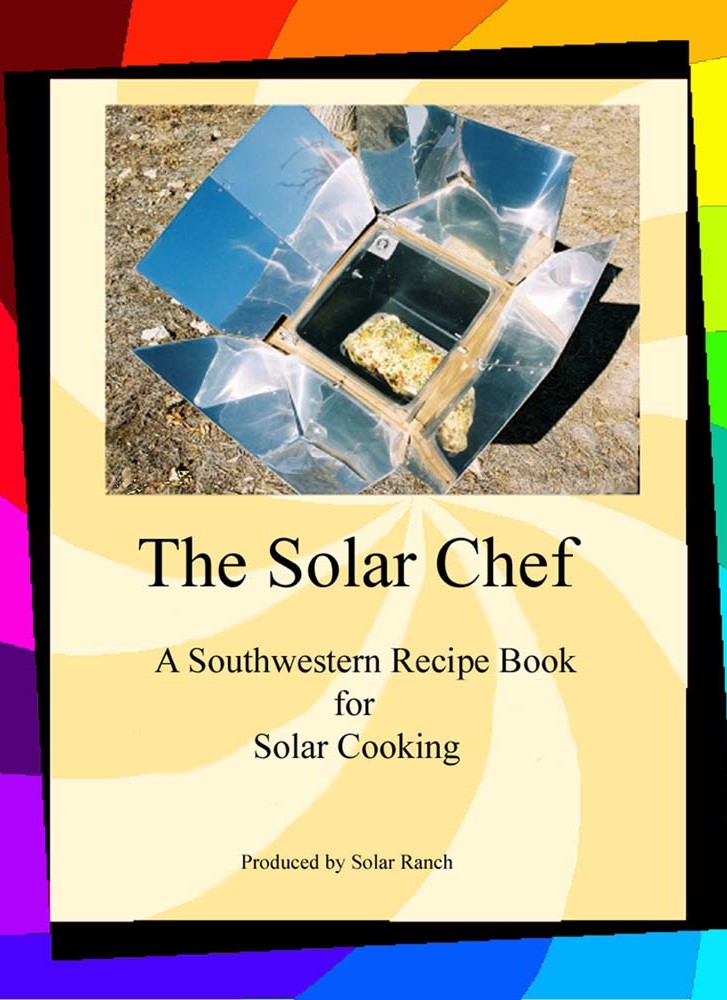
My book,  “The Solar Chef” is filled with time tested recipes and tips for cooking with sunlight, many of them are examples of true gourmet cooking. From soups to bread, solar cooking is a treat and a joy. So turn the pages and bask in the Sun!
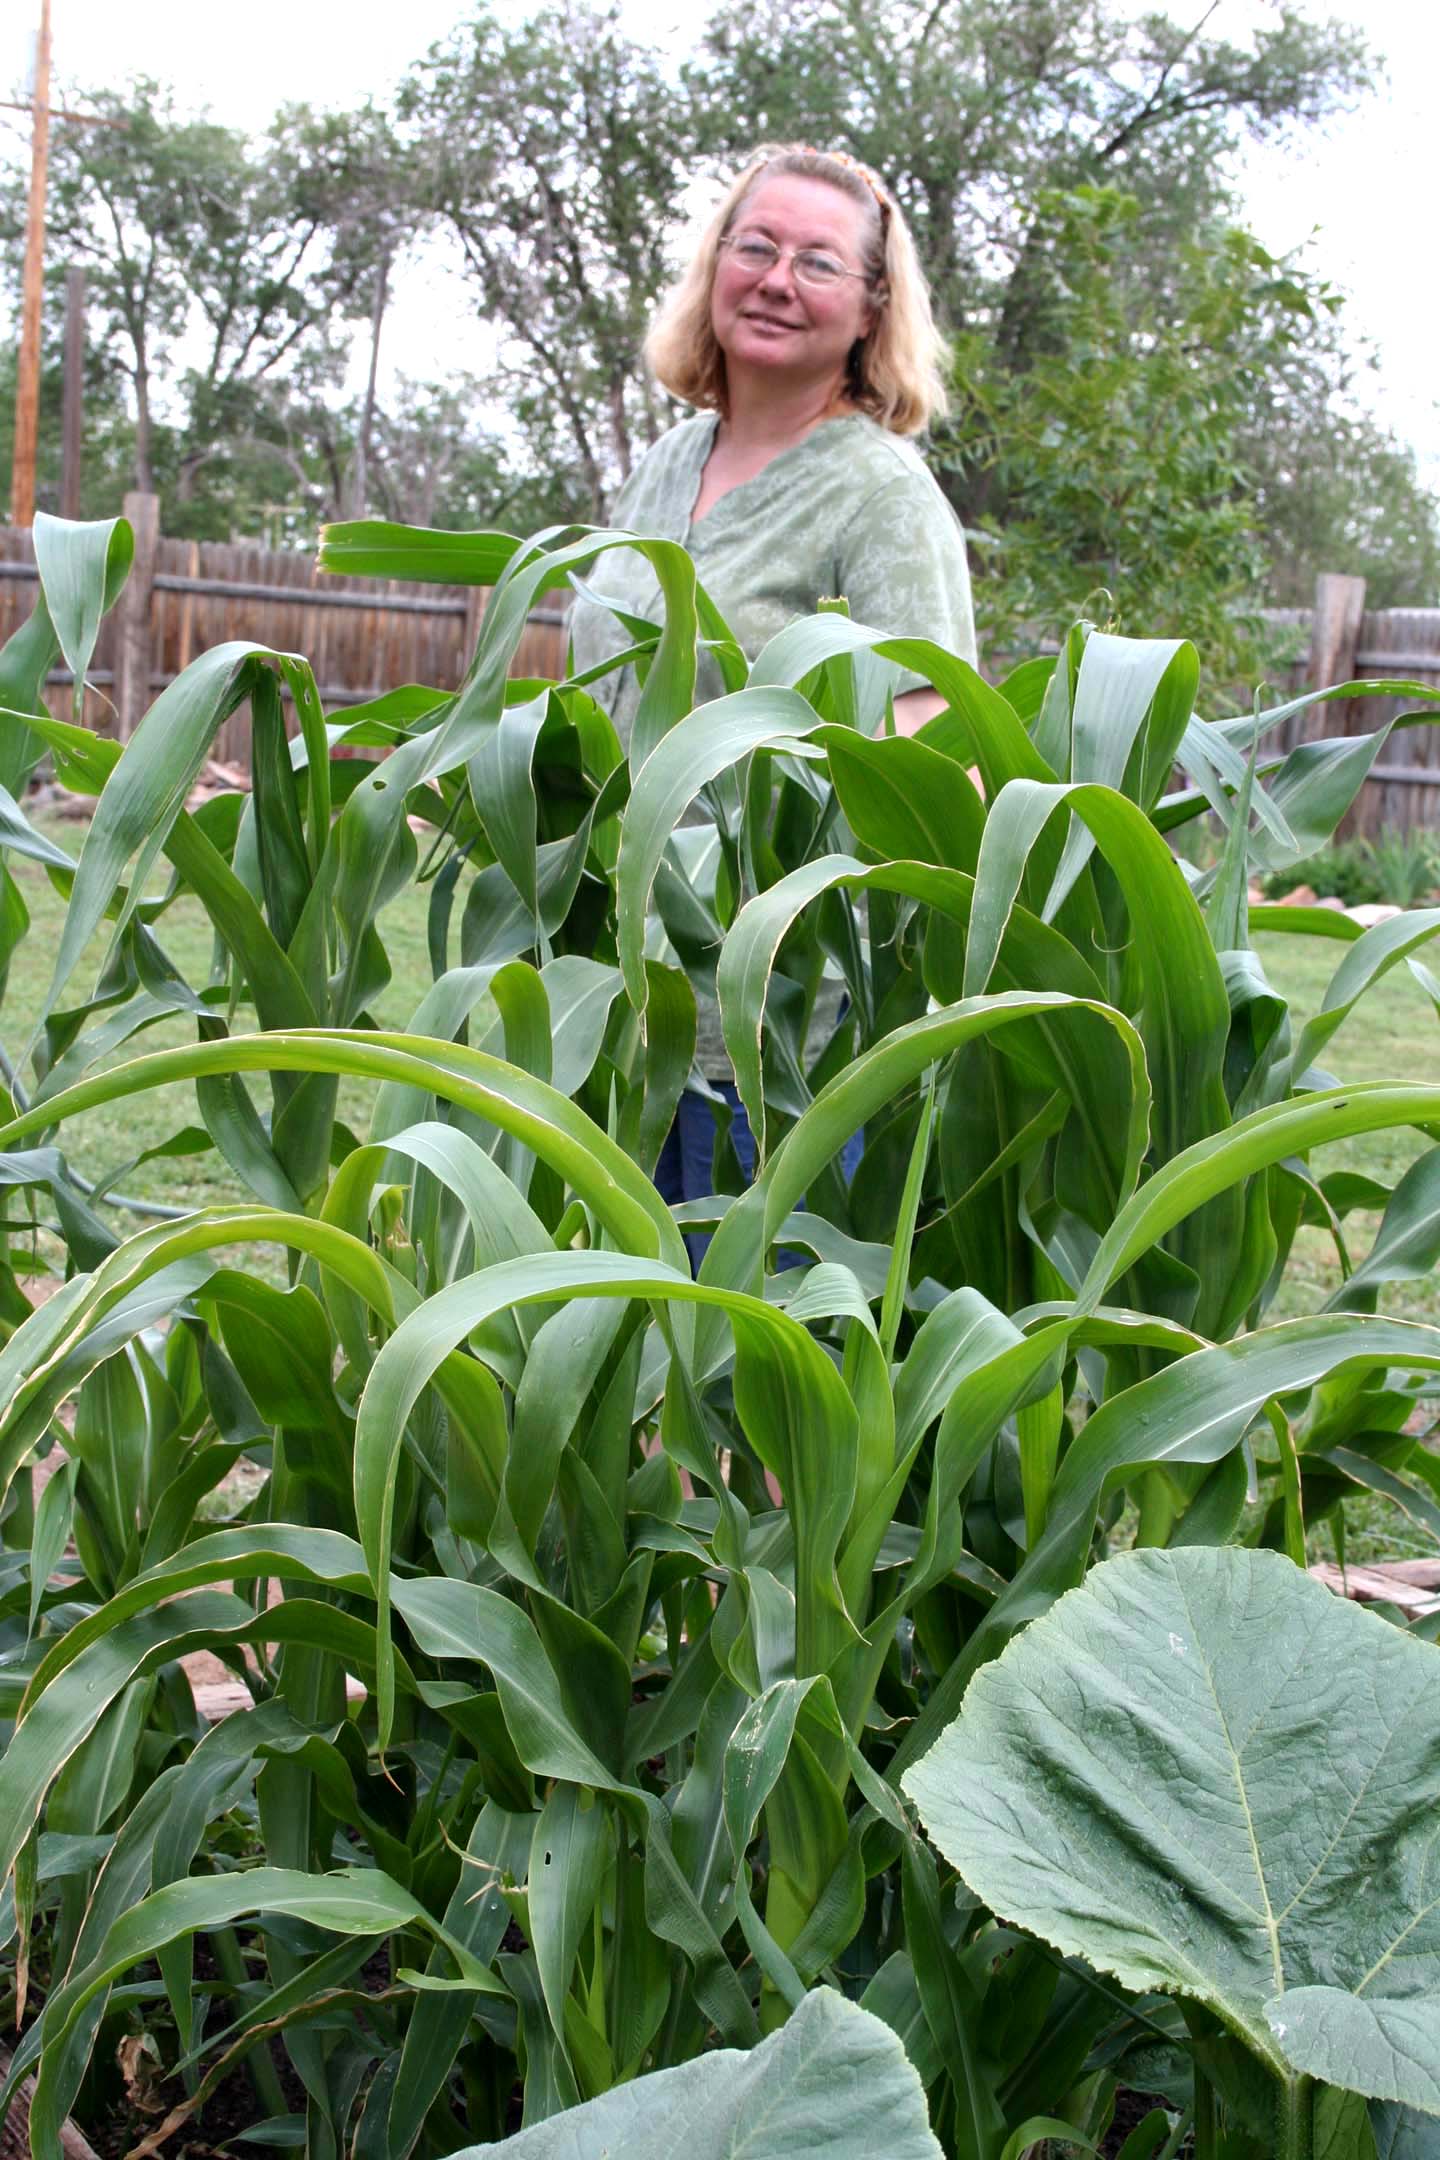
In this cookbook at the top of each recipe near its name you will one or more of the abbreviations listed below which describes the kind of sky condition necessary to cook the recipe. For instance: (SKC) means clear skies and full sun only (PC) means you can cook in either clear skies or partially cloudy skies can have some high wispy clouds or a few mid level fluffy cumulous clouds.

Over time you will acquire a feeling for when the cloud cover is simply too dense to cook in. Just remember, the more clouds the slower the cook time. This may not affect the soups and all day dishes very much, but the breads, eggs, and desserts frequently require hotter temperatures.

One thing that I have noticed is that clear skies at or near sea level is a very different thing from clear skies in the higher altitudes of New Mexico, Colorado and Arizona. That extra 5000 to 7000 feet of atmosphere can diminish the ovens temperature somewhat, though the people in Wisconsin will tell you that they can still make some great solar foods!

So Just Have Fun! (and if you screw up a couple of times at first, laugh and forgive yourself)